Archive for the ‘Household hints’ Category

Rapid hot water in a home

Friday, May 8th, 2020

The home hot water heater is usually too far from some of your hot water taps, so you have to open the tap and let the water run, wasting it, until the not-hot water standing in the pipe gets replaced by fresh hot water.

In new construction or remodels, the best solution is usually a small (say 3/8”) copper tube (or maybe PEX) from the most remote tap back to the cold water inlet of the hot water heater, through a quiet low-power recirculating pump that runs continuously. You don’t want a fast pump here, because too-rapid water motion causes the white mineral deposits that line copper pipes to erode away, exposing raw copper, which can be hazardous when it dissolves into the water. That could also promote leak formation.

The weak point may be that several taps are too far from the main circulating loop of hot water, so some will still require running the water for a while to get it hot. That can be avoided in a new design by routing the hot water loop so that none of the branches to taps are very long. For a retrofit, running additional tubes from the worst ones back to the pump. If you are lucky, enough water will flow in each branch to solve your problem.

The hot-water pipes and the recirculating tubes should be insulated, of course, so as not to waste heat.

Existing construction that wasn’t well designed

I recently moved to a villa in a retirement community that was not designed with hot water in mind. Instead of a dedicated return tube, they installed a pump on the hot water tank that raises the pressure of the hot water slightly, and under the remotest bathroom sink there is a temperature sensitive valve that lets water flow from the hot pipe to the cold whenever the hot water is cooler than the valve’s set point. (See Watts Premier Instant Hot Water Recirculating Pump System with Built-In Timer.)

That sounds good initially, the pump is quiet, and it does work, but it has a consequence: the cold water pipe is full of hot water too. Both the hot tap and the cold tap give you hot water, unless you run the cold for a long time. Not what you want for drinking or taking pills.

The manufacturer recognized that this is problematic, so they added a fancy mechanical timer that lets you choose, for each 15-minute interval in the 24 hour day, whether you want the timer to run or not: so you can schedule when in the day you want both taps to give you hot, or both give you cold; of course, you can always run the one that’s wrong until it’s right, but that wastes both water and time, so it’s not a pleasant solution.

There are other surprises too. For example, if you take a shower, there’s no cold (or hot) water to temper the hot (or cold) unless you let the water run a long time. If your water is too hot, you could get scalded if you jump in without checking—you can’t just add more cold as you might expect, because there isn’t any yet.

I prefer having hot water quickly, so I let the pump run always. It’s good for washing hands, but bad for drinking, taking pills, or brushing teeth.

I solve the cold problem by keeping a water glass full of cold (ok, room temperature) water sitting near the sink. I fill it after flushing the toilet, which uses up all the hot water that had been returning in the cold pipe, so I get cold water without much delay.

But things like to grow (or collect) in room temperature water, so you have to change the water frequently and wash the glass.

To me, this seems like an awful lot of trouble just for saving perhaps 40’ of tubing.

New construction ought never make this blunder.
iSesamo design changes?

Thursday, May 22nd, 2014

A few years ago I purchased an iSesamo  tool. It’s very handy for opening things that weren’t meant to open, like snap-together plastic housings. It is very thin flexible springy polished stainless steel, with useful bevels and curves at the ends and a molded-on handle in the middle to protect you from the thin edges.

I recently discovered it’s also great for prying 3D prints off the build plate of a plastic-filament extruder style of printer.

The tool is so handy that I found I often had left it “somewhere else”, so I decided to buy a few more to make sure I’d usually have one handy.

But this week I had a terrible time getting a 3D print loose. I blamed it on new-to-me material (PLA) on a new-to-me bed coating (http://BuildTak.com) on a new-to-me bed (glass, heated, removable—http://www.bctechnologicalsolutions.com). The iSesamo wouldn’t get between the printed part and the BuildTak, and when I pressed harder it dove down through the BuildTak and plowed a hole in it, and permanently bent the iSesamo! I’ve bent the original iSesamo very severely many times before without ever having it become permanent, which amazes me, but that’s now what I expect.

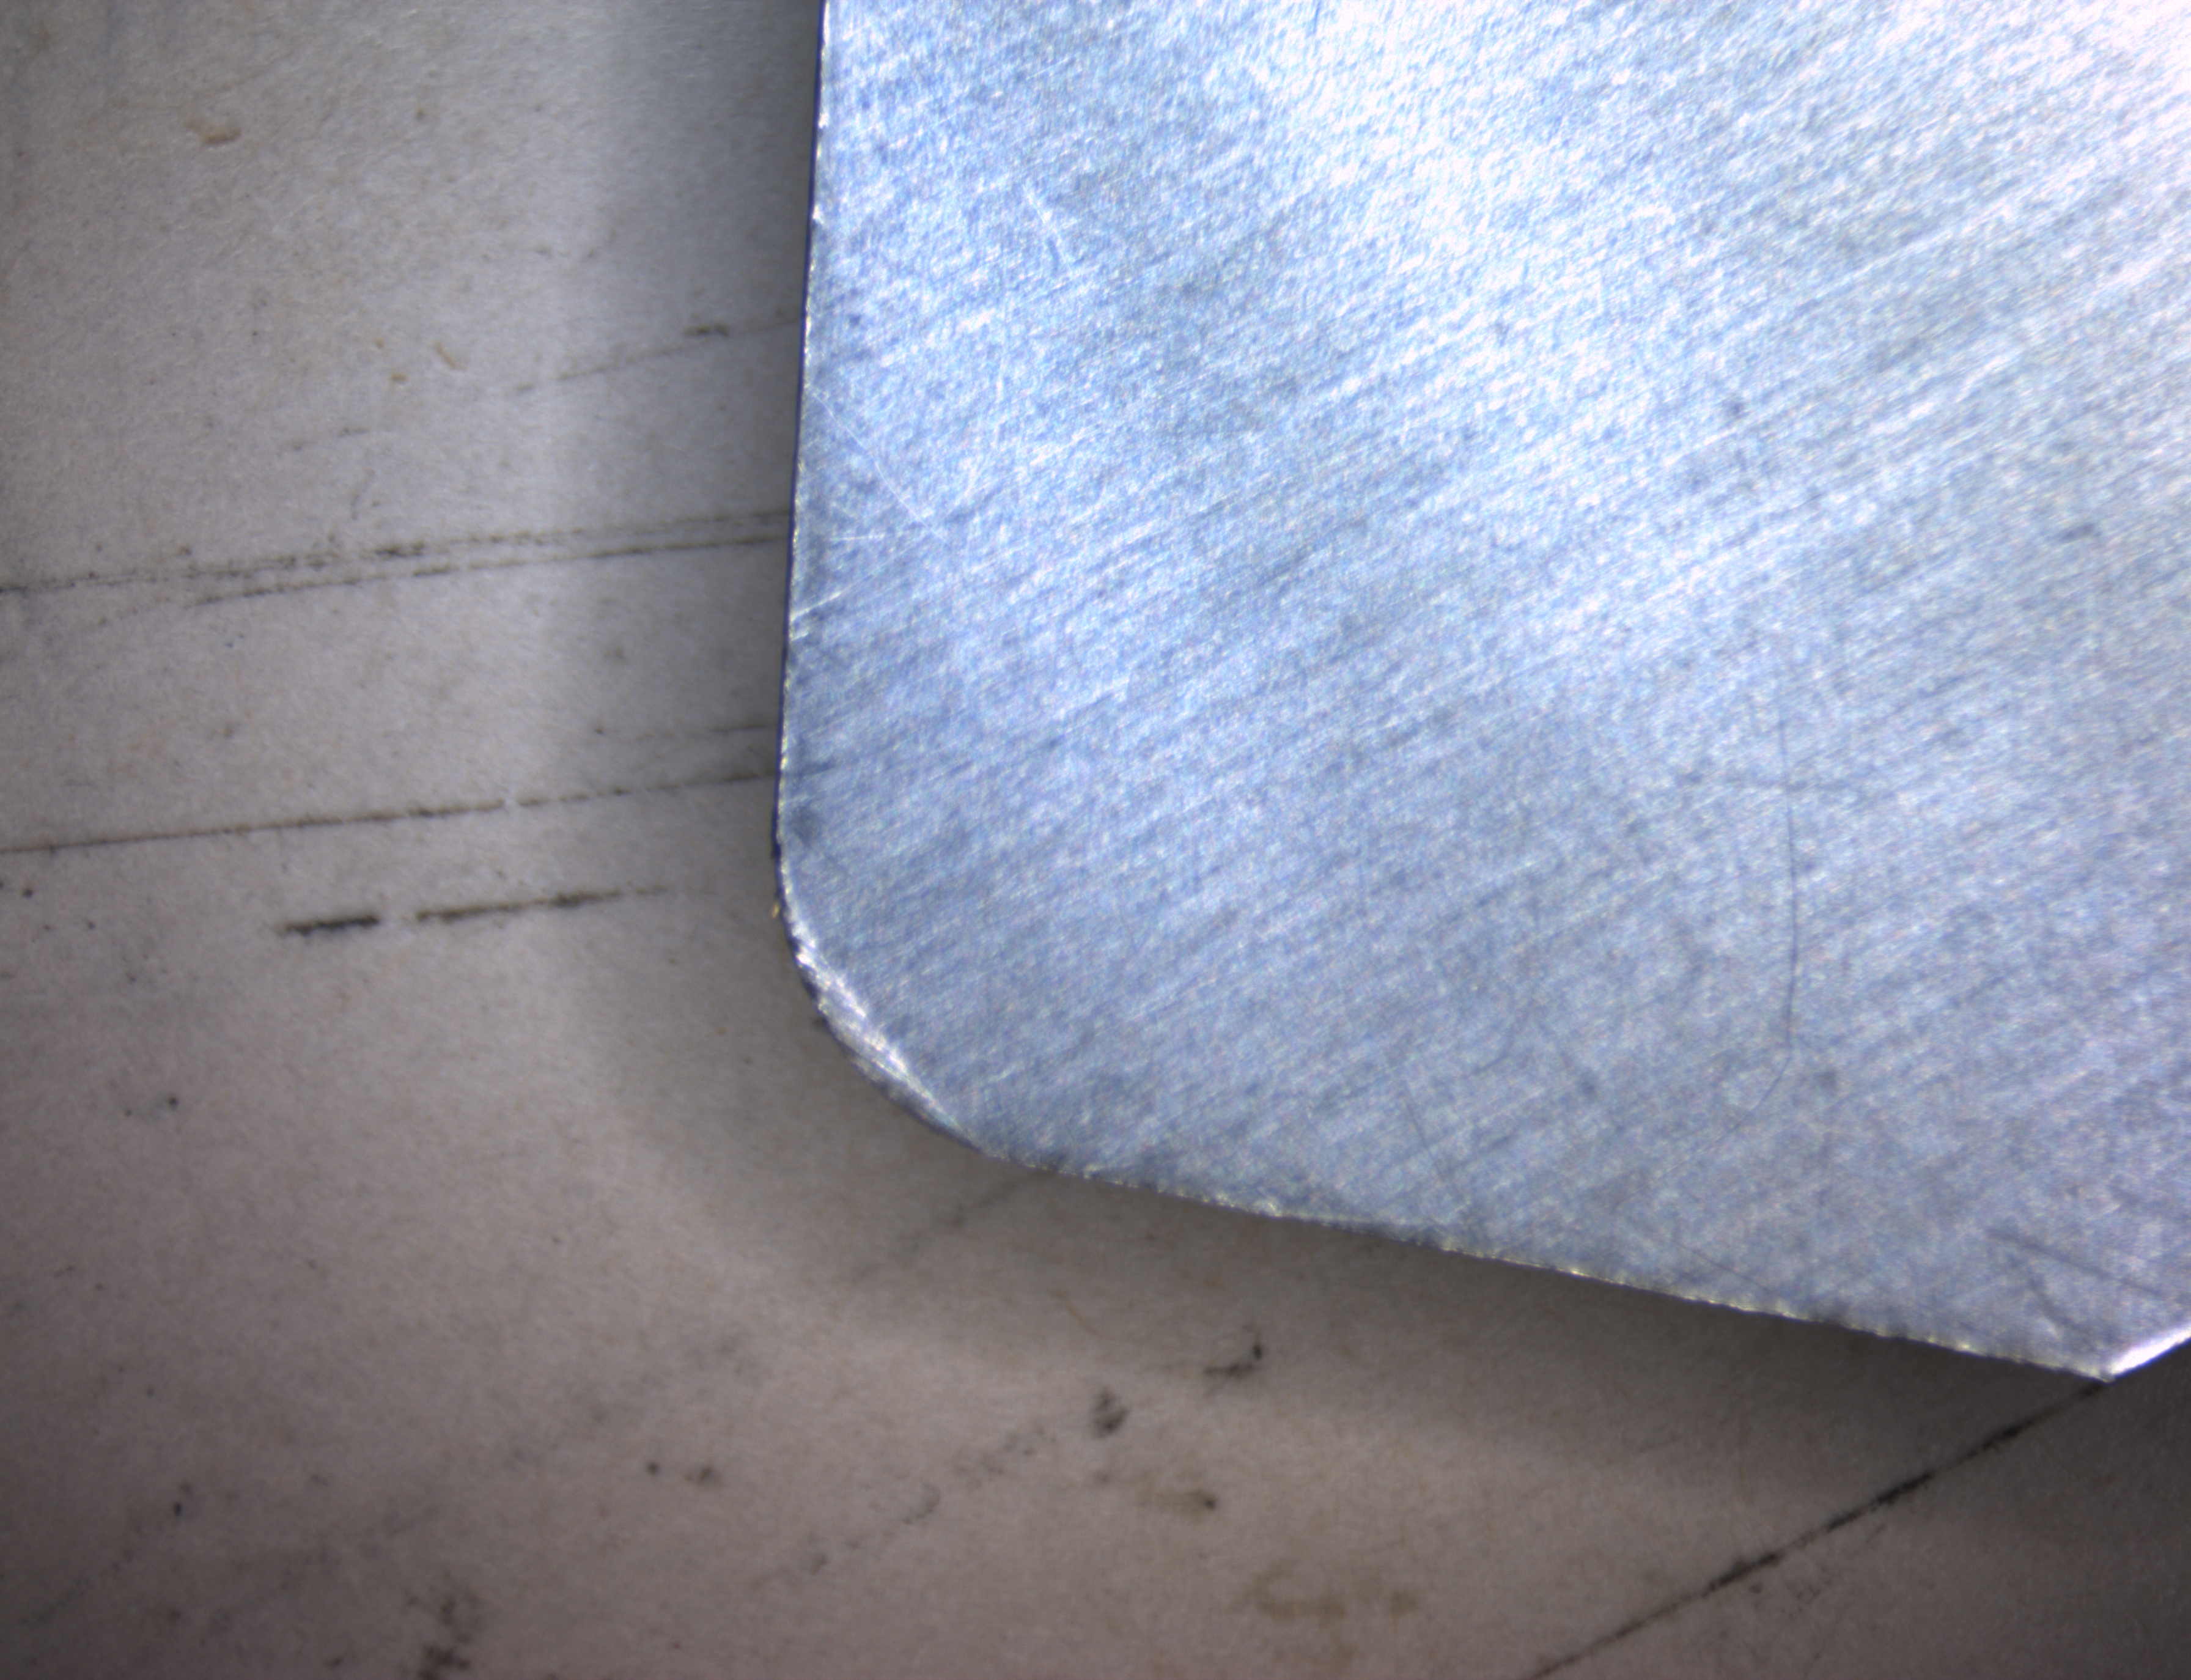
Then I took a more careful look at the new iSesamo, and discovered it’s not like the original one. Its molded handle is thinner, .135″ compared to .160″, and its edges are not smoothly tapered but square and sharp, like metal freshly stamped from a sheet. The original surely was also stamped from a sheet, but it must have been tumble-polished or something, because its edges are gently tapered and smooth. One of those sharp edges caught in the BuildTak and pulled the tool right down into and through it, where the original iSesamo would have sought out the weaker plane between BuildTak and PLA part and followed it. I did use the original for further removal attempts, and indeed that’s how it behaved. You are holding it at a shallow angle to the flat build plate, and pressing down, and the thin metal end gets parallel with the plate and guides itself along very smoothly.

So what’s the deal? Why are the new ones (all 3) different? Is it just a bad batch, or is it a new cost-lowering approach by someone who didn’t really understand what made it a great and useful tool?

I wondered for a bit whether it is my use of the tool that wore it smooth and polished, but I’m pretty sure that’s not the case, because the smoothness extends to regions of the blade near the handle that I probably have not used.

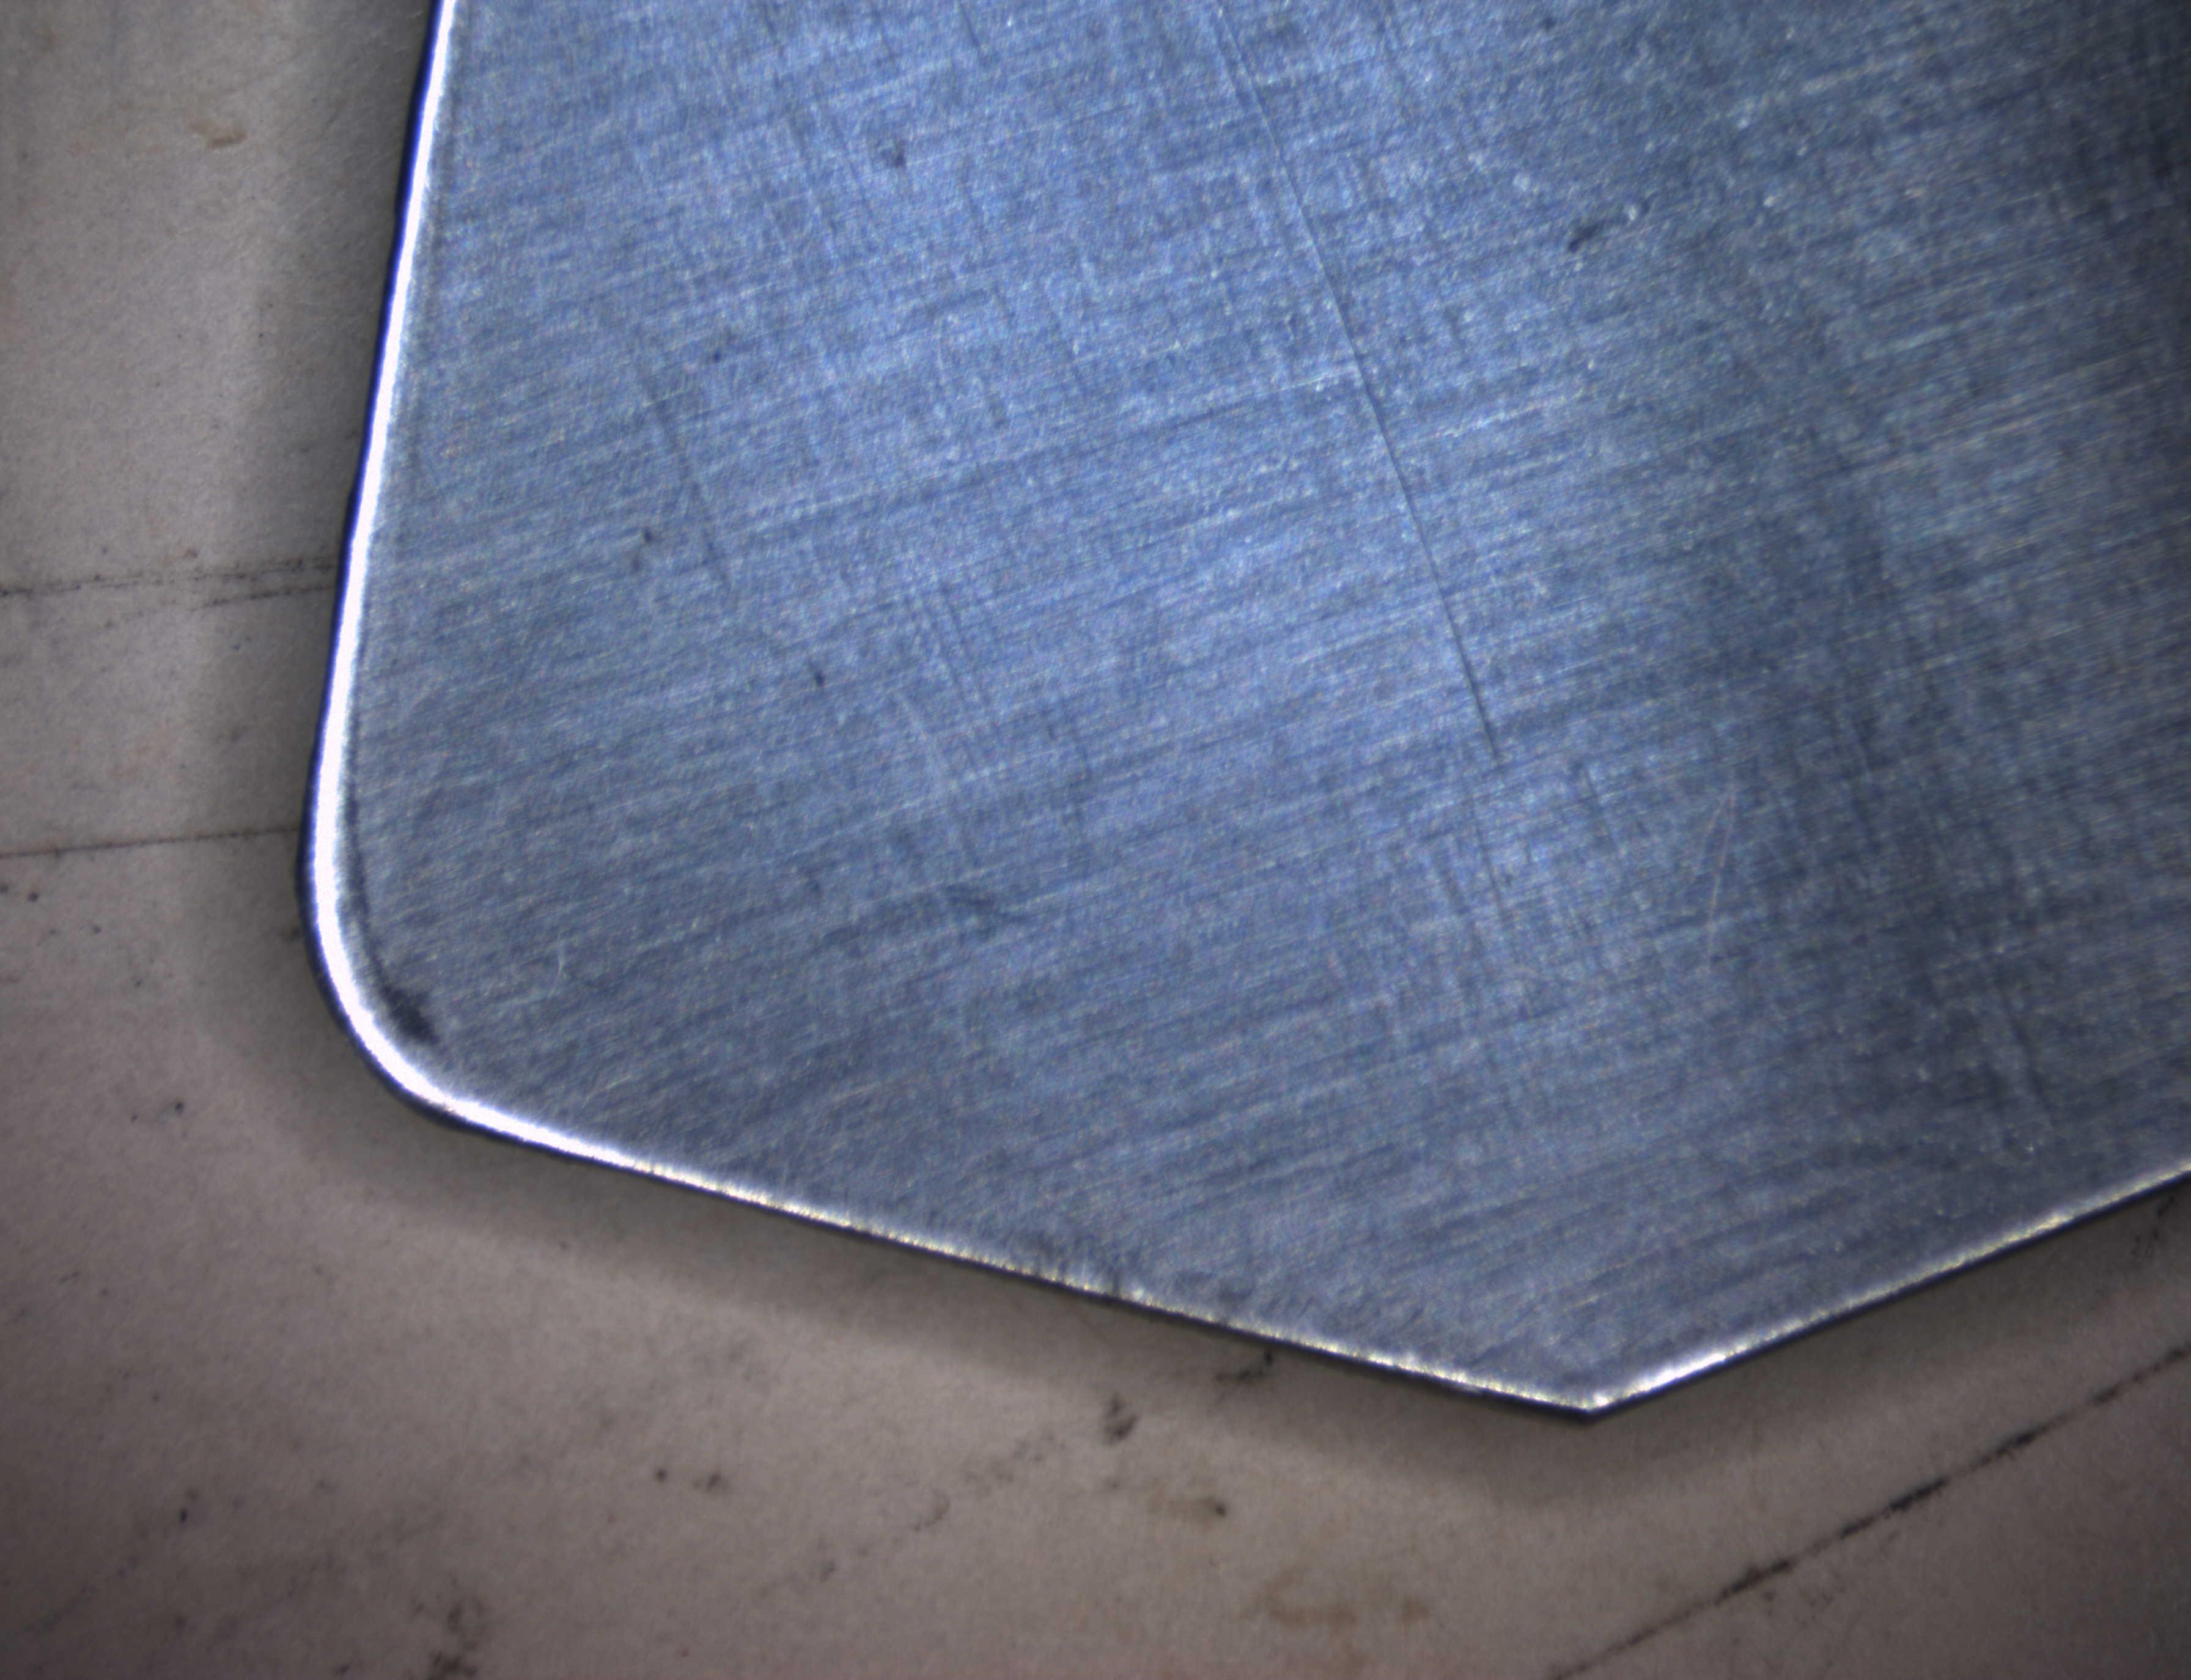
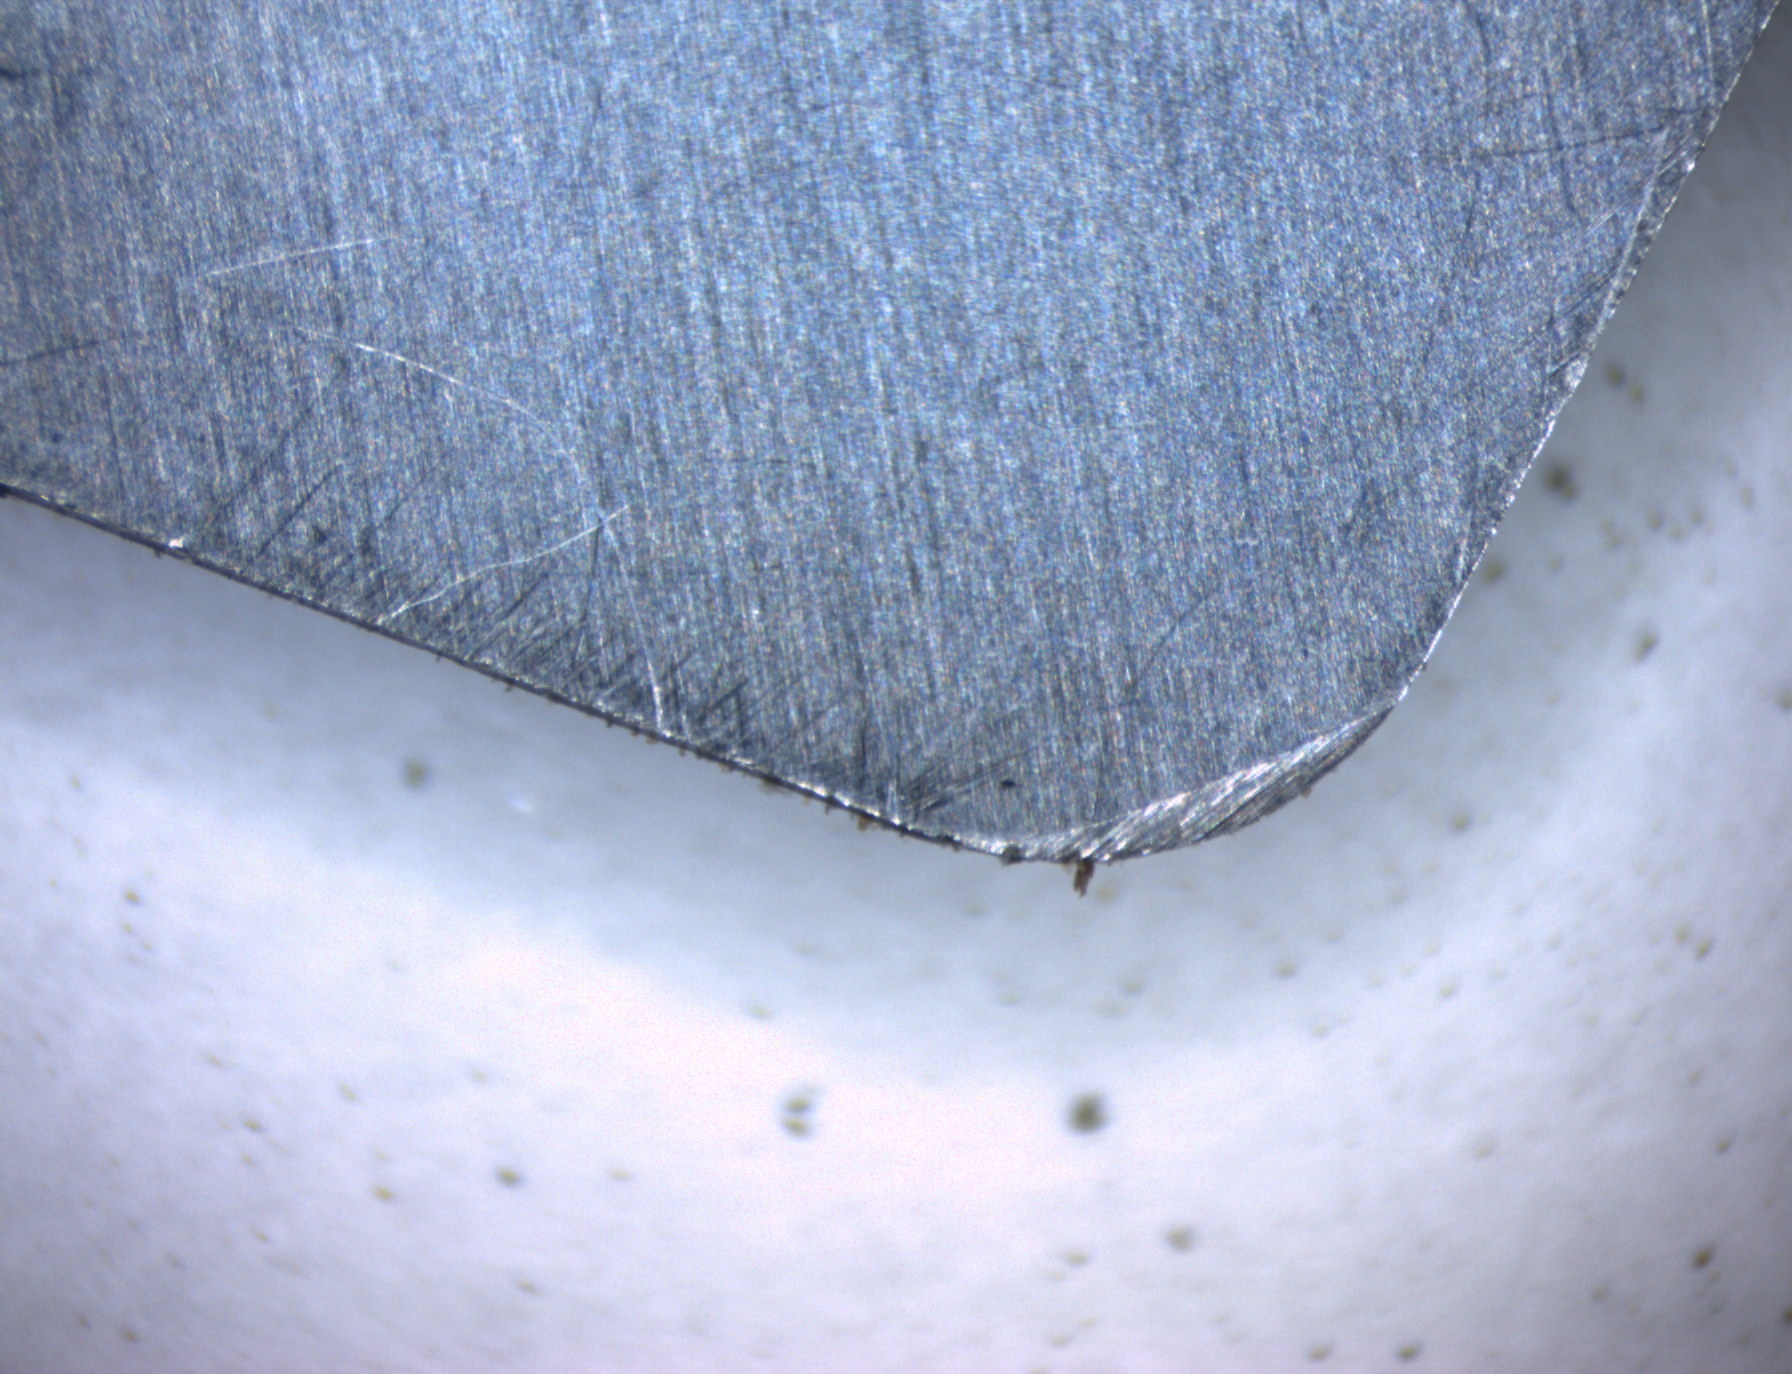
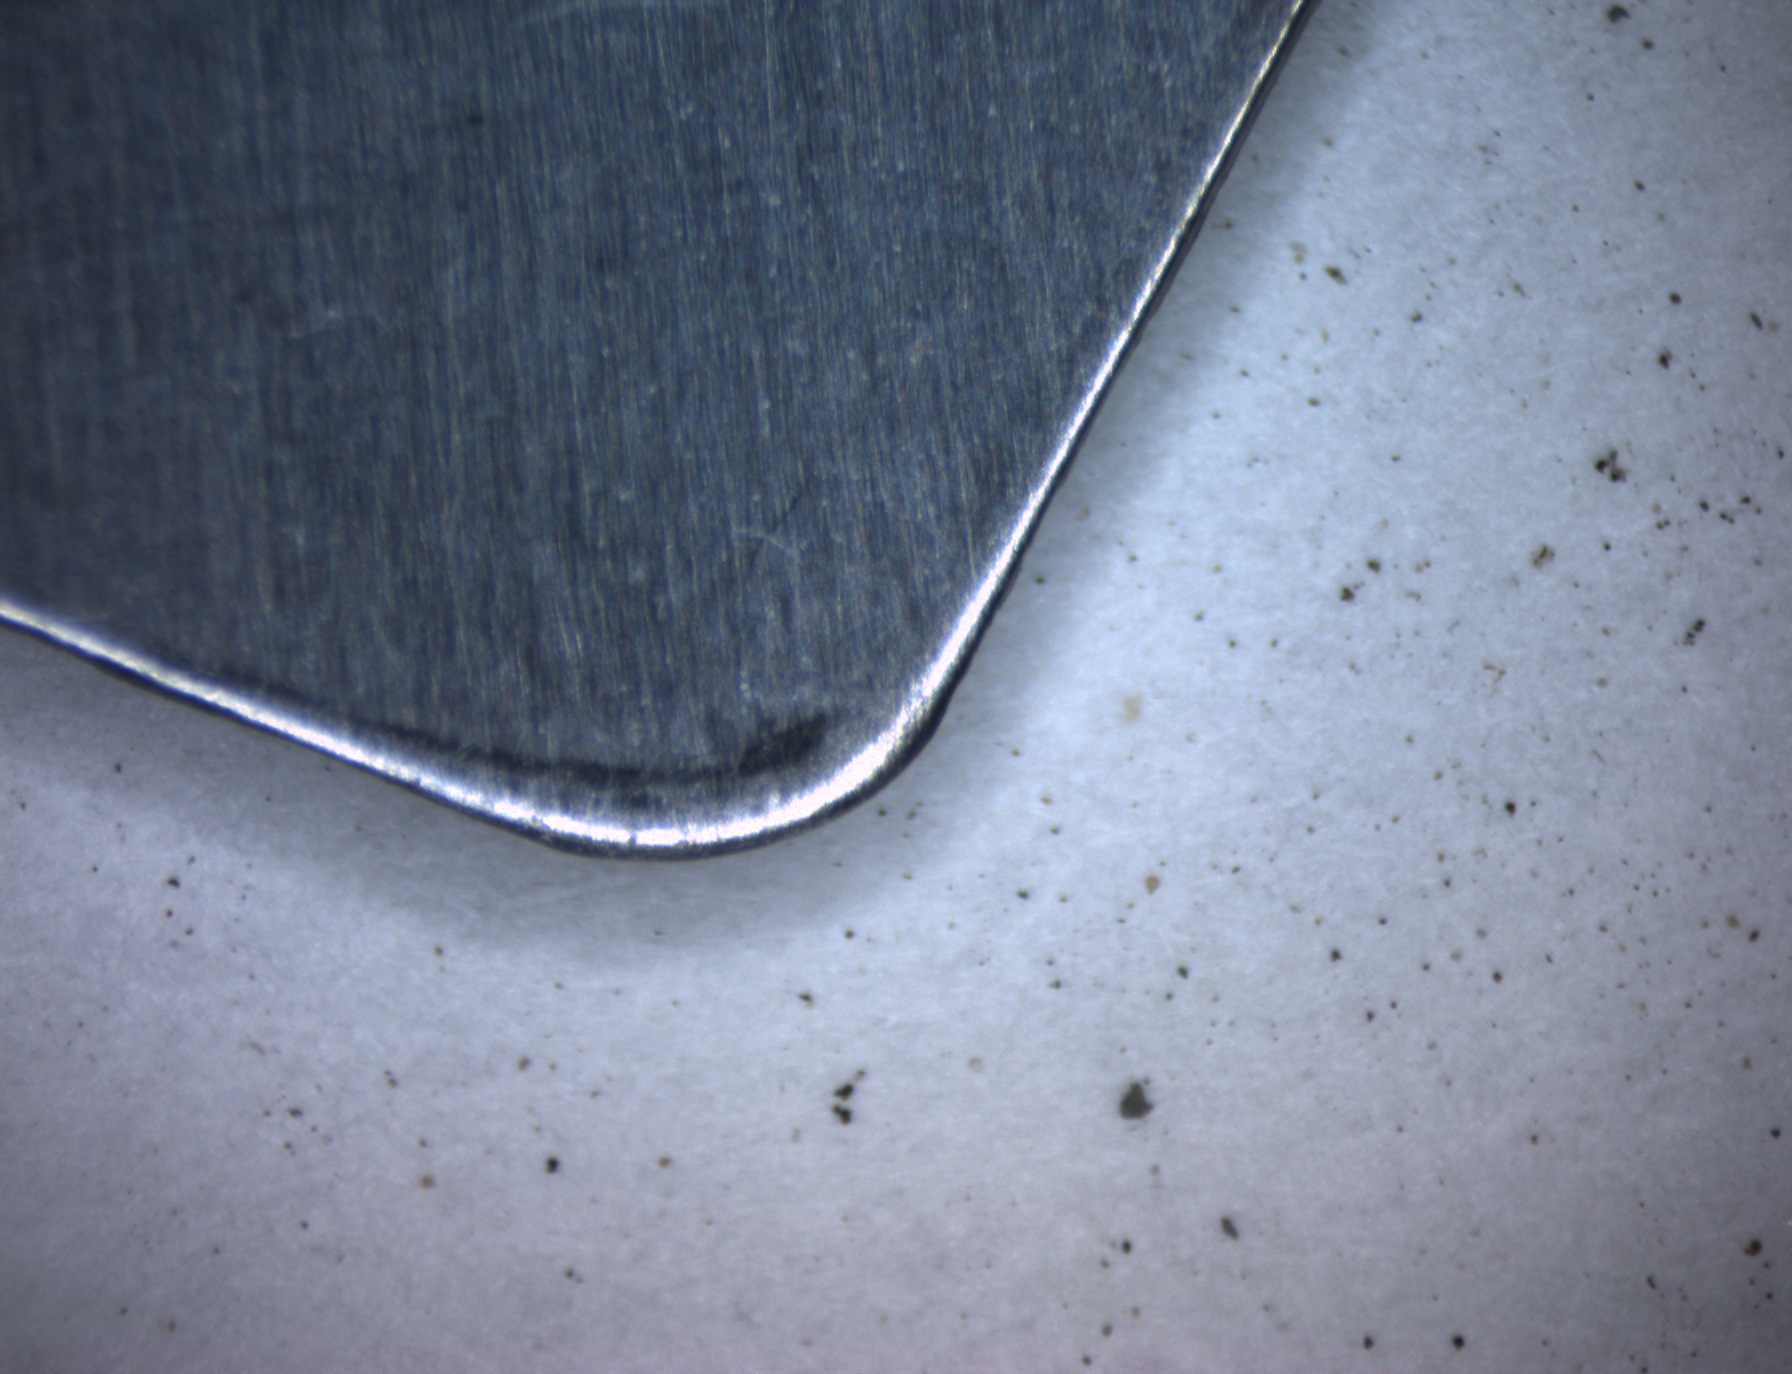
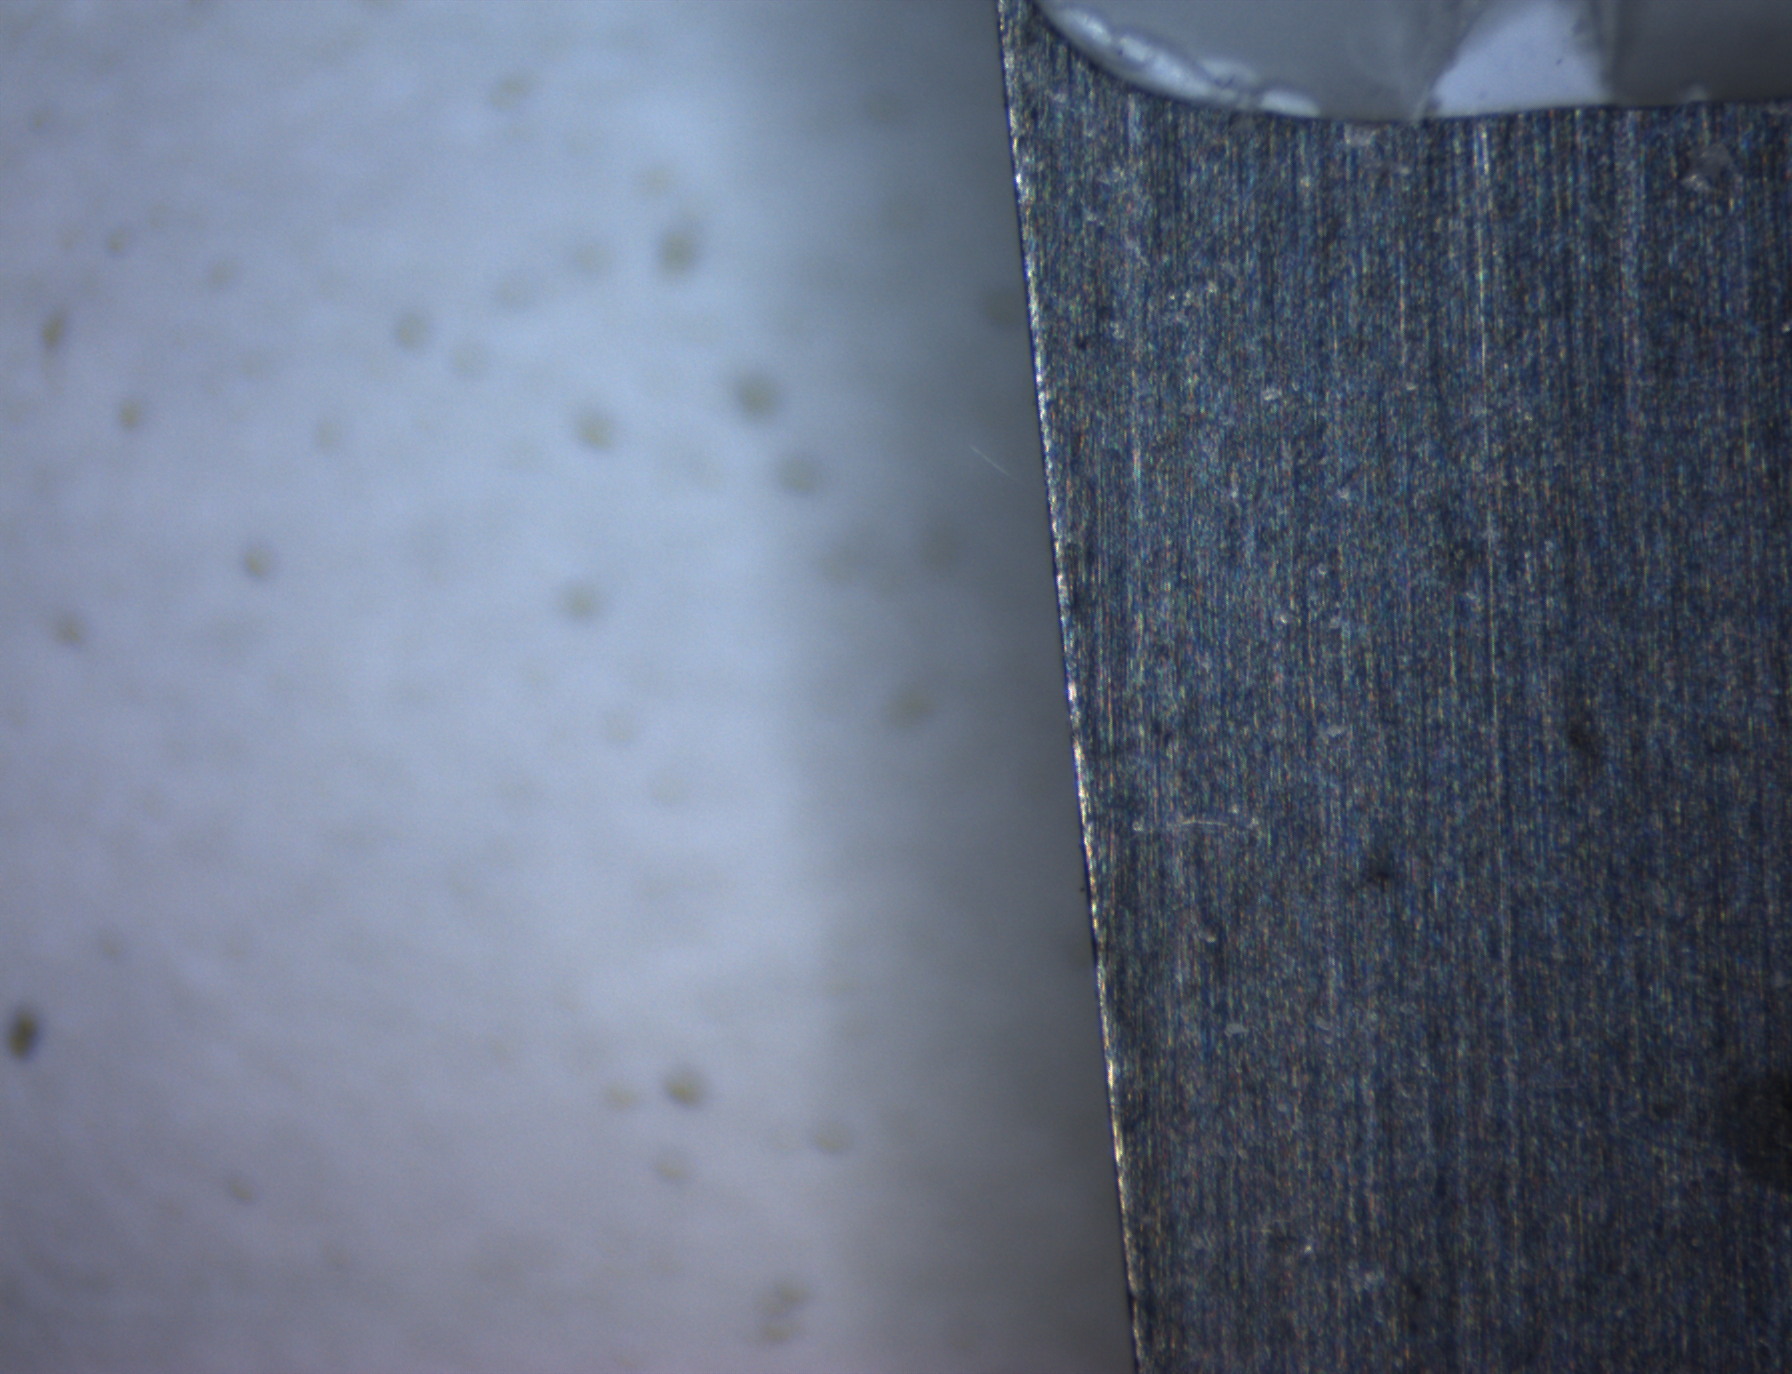
I took some microscope pictures to try to understand and describe the problem. Note that the low magnification pictures all use the same magnification, and the high magnification pictures do also, so the narrowing of the edge in the original tool is really a measure you can compare with the edge of the new tool.

Here are the photos:
New tool, low magnification, flat view                          
Another low mag flat view
Original tool, low magnification, flat view
Another Original low mag flat view

New tool, low magnification, another flat view                    
New low mag flat view
Original tool, low magnification, another flat view
Original low mag flat view

Notice how the new edge is just squared off from being stamped out, while the original is smoothed and sharp-ish.

New tool, high magnification, edge view                        
New high mag edge view
Original tool, high magnification, edge view
Original high mag edge view

It’s hard to show, but one of them looks like there was a surface layer in the original that’s different from the material in the body of the blade, kind of a Damascus Steel layering, to get the best properties of two different alloys.

Original, high mag, just-past-edge view, layers. Looks like smooth outer layers over hard mid layer in tool. Focused below sharp edge.
Original high mag just past edge view

New, low mag, edge near handle. No polishing or smoothing.
New low-mag flat side view

How to move things when there’s not room for jacks

Friday, March 8th, 2013

I have had to move some heavy things that were in an awkward place. I had built some big shelf units to hold 36 banker’s boxes of paper each, to store 72 boxes in an outbuilding. Each weighed well over 1000 pounds. I put 2-inch (50mm)-wide aluminum extrusions on the floor to make smooth tracks, and teflon pads on the bottom of the shelves, thinking I’d be able to move them out of the way so I could get to other things in the building. But the scheme didn’t work. The floor didn’t stay quite flat, and after sitting in one place for a long time the pads didn’t slide on the aluminum, so I couldn’t move the shelves.  I tried to lift the shelves to put some rollers under them, but the limited space around them made it very difficult to use levers and wedges, and there was only a quarter inch (6mm) gap under them, at most. I tried clamping a wooden bar to the side of the shelves and lifting that with a hydraulic jack, but the huge weight just caused the clamps to slip and tear into the plywood of the shelf units while I pumped the jack.

So I was stuck for a while. But then I got an idea.

I took a large ziplock plastic baggie, which is thin enough to slip under the shelves into the  gap between the bottom plywood sheet and the floor. I stuck a thin plastic tube into it, by pushing a sharp pointed awl from the inside of the open bag out through one far corner, sticking the plastic tube onto the awl, and withdrawing the awl and tube so that the tube ended up entering the baggie through a tight stretched inverted hole in the corner. I added some ordinary tape to hold the tube in place, and zipped the baggie shut. I slid the baggie completely under the shelf unit, inside the small gap, and inflated it with compressed air. Because of the large area of the bag, it does not take much pressure to generate a lot of force, and the shelf unit lifted easily. I had to experiment with how high to go, because the bag will come unzipped or burst if you go too far, and everything drops suddenly. But it was easy to slip wedges and blocks under the shelf, carefully keeping fingers away from the danger area, and lift the shelves bit by bit, inserting spacers like magazines to keep the baggie thin as needed.

There are enormous baggies available, intended for storing blankets etc.

Once I had a little working space, like 10 or 20mm, I tried another scheme, using beach balls. I connected four beach balls to thin tubes using ball inflator tips, and put little valves on the tubes so I could control them separately. With one ball underneath near each corner, it was easy to raise the shelf unit far enough to get big blocks underneath in one step, but there is a new problem–the shelf unit is free to move from side to side when on the balls, so everything is unstable. It works better to just lift one side at a time, blocking up the sides alternately, so the heavy shelf can’t roll around.

It’s tempting to use the beachballs instead of rollers for the normal moving of the shelves, but I’d need some good way to control the motion. Also, the tubes get in the way–if a ball rolls over the inflation needle and tube, something is likely to break.

Another time, I needed to bend a heavy board away from the wall (in a corner of a room) briefly while I passed a Cat-5 network wire through the gap, and I used the baggie-with-air trick again.

eBay Buyer Protection no help with foreign purchases

Wednesday, November 28th, 2012

I bought a battery charger/exerciser from a Chinese seller on eBay, and it arrived non-functional. I.e., it lit up but it wouldn’t charge anything, it merely complained about the battery connection (which worked fine on other chargers, my older one and the one I later bought from an American vendor to replace this dead one). So, it was DOA even though it didn’t look like it at first glance. It probably passed a superficial test at the factory, which wouldn’t have taken time to actually try charging something.

I tried for a long time to negotiate with the seller, and she went as far as offering me another one for half price. Finally, when I repeated that I felt since I’d bought and paid for a working one, that’s what I should receive–I shouldn’t have to buy it again, even with a discount, she said OK 😉

But nothing ever arrived, and she never responded again to my emails. Her listings still appear on non-US eBay sites, though she seems to have withdrawn from the US sales for the time being.

So, it seemed clearly like a case where I should invoke the Buyer Protection Plan. (Product does not match description (it doesn’t work, but description implies it does)).

All seemed fine until the end, where eBay gave me 3 days notice (while I was away on a trip) to prove that I had returned the product, using a traceable shipping method. Miss the sudden deadline, and the complaint is void!

Even though the product had been mailed to me from China for less than $20, the shipper had a special deal. The price for me to ship it back traceably using UPS was more than the initial price of the product!

So, the Buyer Protection plan was actually worse for me than doing nothing and just eating my loss, which of course I did. As far as I can tell, eBay does not provide any way to tell them this–every complaint pathway is fully automated so that there is no way to tell the story to a human, and the system does not want to discuss my type of complaint.

So, people need to realize: buying from eBay may not be safe, despite their claims of Buyer Protection. You will be out the return-shipping costs, even if the product is dead on arrival, and those costs can easily exceed the price of the merchandise, especially when you’re buying from a remote seller, like Hong Kong or China.

Of course, some sellers care about their reputation and will do the right thing, but buying through eBay is at your own risk in some cases, and partially so in other situations.

Stain Removal

Friday, November 2nd, 2012

I’ve been very pleasantly surprised at the capability and effectiveness of the Tide Buzz, an ultrasonic stain removing system.

It has an ultrasonic wand with a little detergent jet next to it, controlled by separate adjacent buttons.

I don’t know what’s in the detergent mix that they use, but it really gets activated by the ultrasound. If you put fabric in an embroidery hoop so you can see the front side, while you watch as you add detergent to the  back side, there’s a spray of liquid showering out the front, carrying the dirt/stain with it. They provide absorbent pads that you can use for carrying away the fluid and stain, which also work well; but so does a wad of tissue.

I’ve run into problems sometimes with the detergent pump system getting plugged, especially after I haven’t used it for a while. I took it apart and am impressed by the simplicity and elegance of the pump, which is a peristaltic pump built on very durable tubing. I found the blockage was in the nozzle in the wand, easily fixed (though I did have to grind a little gap into a screwdriver to get it to work with the special screws). Since then, I’ve learned that I can fix the problem when it recurs by filling a hypodermic syringe with water, removing the detergent bottle, and gently pressing the syringe against the inlet hole while I run the pump. Just takes seconds. I suspect the blockage problem is the reason this device hasn’t been successful in the marketplace, because the cleaning method really works well.

Water and soap can also work, but doesn’t make the ultrasonic spray the genuine fluid does, so likely is not as effective.