Rapid hot water in a home

May 8th, 2020

The home hot water heater is usually too far from some of your hot water taps, so you have to open the tap and let the water run, wasting it, until the not-hot water standing in the pipe gets replaced by fresh hot water.

In new construction or remodels, the best solution is usually a small (say 3/8”) copper tube (or maybe PEX) from the most remote tap back to the cold water inlet of the hot water heater, through a quiet low-power recirculating pump that runs continuously. You don’t want a fast pump here, because too-rapid water motion causes the white mineral deposits that line copper pipes to erode away, exposing raw copper, which can be hazardous when it dissolves into the water. That could also promote leak formation.

The weak point may be that several taps are too far from the main circulating loop of hot water, so some will still require running the water for a while to get it hot. That can be avoided in a new design by routing the hot water loop so that none of the branches to taps are very long. For a retrofit, running additional tubes from the worst ones back to the pump. If you are lucky, enough water will flow in each branch to solve your problem.

The hot-water pipes and the recirculating tubes should be insulated, of course, so as not to waste heat.

Existing construction that wasn’t well designed

I recently moved to a villa in a retirement community that was not designed with hot water in mind. Instead of a dedicated return tube, they installed a pump on the hot water tank that raises the pressure of the hot water slightly, and under the remotest bathroom sink there is a temperature sensitive valve that lets water flow from the hot pipe to the cold whenever the hot water is cooler than the valve’s set point. (See Watts Premier Instant Hot Water Recirculating Pump System with Built-In Timer.)

That sounds good initially, the pump is quiet, and it does work, but it has a consequence: the cold water pipe is full of hot water too. Both the hot tap and the cold tap give you hot water, unless you run the cold for a long time. Not what you want for drinking or taking pills.

The manufacturer recognized that this is problematic, so they added a fancy mechanical timer that lets you choose, for each 15-minute interval in the 24 hour day, whether you want the timer to run or not: so you can schedule when in the day you want both taps to give you hot, or both give you cold; of course, you can always run the one that’s wrong until it’s right, but that wastes both water and time, so it’s not a pleasant solution.

There are other surprises too. For example, if you take a shower, there’s no cold (or hot) water to temper the hot (or cold) unless you let the water run a long time. If your water is too hot, you could get scalded if you jump in without checking—you can’t just add more cold as you might expect, because there isn’t any yet.

I prefer having hot water quickly, so I let the pump run always. It’s good for washing hands, but bad for drinking, taking pills, or brushing teeth.

I solve the cold problem by keeping a water glass full of cold (ok, room temperature) water sitting near the sink. I fill it after flushing the toilet, which uses up all the hot water that had been returning in the cold pipe, so I get cold water without much delay.

But things like to grow (or collect) in room temperature water, so you have to change the water frequently and wash the glass.

To me, this seems like an awful lot of trouble just for saving perhaps 40’ of tubing.

New construction ought never make this blunder.

iSesamo design changes?

May 22nd, 2014

A few years ago I purchased an iSesamo  tool. It’s very handy for opening things that weren’t meant to open, like snap-together plastic housings. It is very thin flexible springy polished stainless steel, with useful bevels and curves at the ends and a molded-on handle in the middle to protect you from the thin edges.

I recently discovered it’s also great for prying 3D prints off the build plate of a plastic-filament extruder style of printer.

The tool is so handy that I found I often had left it “somewhere else”, so I decided to buy a few more to make sure I’d usually have one handy.

But this week I had a terrible time getting a 3D print loose. I blamed it on new-to-me material (PLA) on a new-to-me bed coating (http://BuildTak.com) on a new-to-me bed (glass, heated, removable—http://www.bctechnologicalsolutions.com). The iSesamo wouldn’t get between the printed part and the BuildTak, and when I pressed harder it dove down through the BuildTak and plowed a hole in it, and permanently bent the iSesamo! I’ve bent the original iSesamo very severely many times before without ever having it become permanent, which amazes me, but that’s now what I expect.

Then I took a more careful look at the new iSesamo, and discovered it’s not like the original one. Its molded handle is thinner, .135″ compared to .160″, and its edges are not smoothly tapered but square and sharp, like metal freshly stamped from a sheet. The original surely was also stamped from a sheet, but it must have been tumble-polished or something, because its edges are gently tapered and smooth. One of those sharp edges caught in the BuildTak and pulled the tool right down into and through it, where the original iSesamo would have sought out the weaker plane between BuildTak and PLA part and followed it. I did use the original for further removal attempts, and indeed that’s how it behaved. You are holding it at a shallow angle to the flat build plate, and pressing down, and the thin metal end gets parallel with the plate and guides itself along very smoothly.

So what’s the deal? Why are the new ones (all 3) different? Is it just a bad batch, or is it a new cost-lowering approach by someone who didn’t really understand what made it a great and useful tool?

I wondered for a bit whether it is my use of the tool that wore it smooth and polished, but I’m pretty sure that’s not the case, because the smoothness extends to regions of the blade near the handle that I probably have not used.

I took some microscope pictures to try to understand and describe the problem. Note that the low magnification pictures all use the same magnification, and the high magnification pictures do also, so the narrowing of the edge in the original tool is really a measure you can compare with the edge of the new tool.

Here are the photos:
New tool, low magnification, flat view                          
Another low mag flat view
Original tool, low magnification, flat view
Another Original low mag flat view

New tool, low magnification, another flat view                    
New low mag flat view
Original tool, low magnification, another flat view
Original low mag flat view

Notice how the new edge is just squared off from being stamped out, while the original is smoothed and sharp-ish.

New tool, high magnification, edge view                        
New high mag edge view
Original tool, high magnification, edge view
Original high mag edge view

It’s hard to show, but one of them looks like there was a surface layer in the original that’s different from the material in the body of the blade, kind of a Damascus Steel layering, to get the best properties of two different alloys.

Original, high mag, just-past-edge view, layers. Looks like smooth outer layers over hard mid layer in tool. Focused below sharp edge.
Original high mag just past edge view

New, low mag, edge near handle. No polishing or smoothing.
New low-mag flat side view

3D Printing software

February 14th, 2014

I’m looking for a good solution for 3d printing, but have run into show-stopping problems in everything I’ve tried (I need to combine a mesh with a geometric object). I’ve used AutoDesk Inventor Pro, Sketchup Pro with extra plugins, MeshLab, NetFabb, OpenSCAD, TinkerCAD,  and some others. Blender looks like it might be capable, but it’s an enormous effort to get into it far enough to tell. It’s extremely modal, and tools disappear when I need them, but reappear when I am doing something else. Maya has also been recommended to me, but that too has a difficult learning curve.

The fundamental problem is that if you do a Boolean operation on two 3D mesh solids, the result is no longer a valid 3D mesh solid. The repair tools can work on the result and be made happy, but Sketchup still refuses to consider the result a solid so won’t allow further steps to be done.
I’ve spent days and days trying to get past this barrier, trying tools and trying hand repairs, always stopped by one insurmountable (by me) problem or another.
There are an enormous number of combinations to learn and experiment with, so this could take a very long time (or I could give up until the software matures).
If anyone can recommend a path that can combine geometry with (valid) mesh solids in a way that can be made to result in a valid mesh solid (so that I can print it), I’d sure appreciate the advice…

More history and ranting

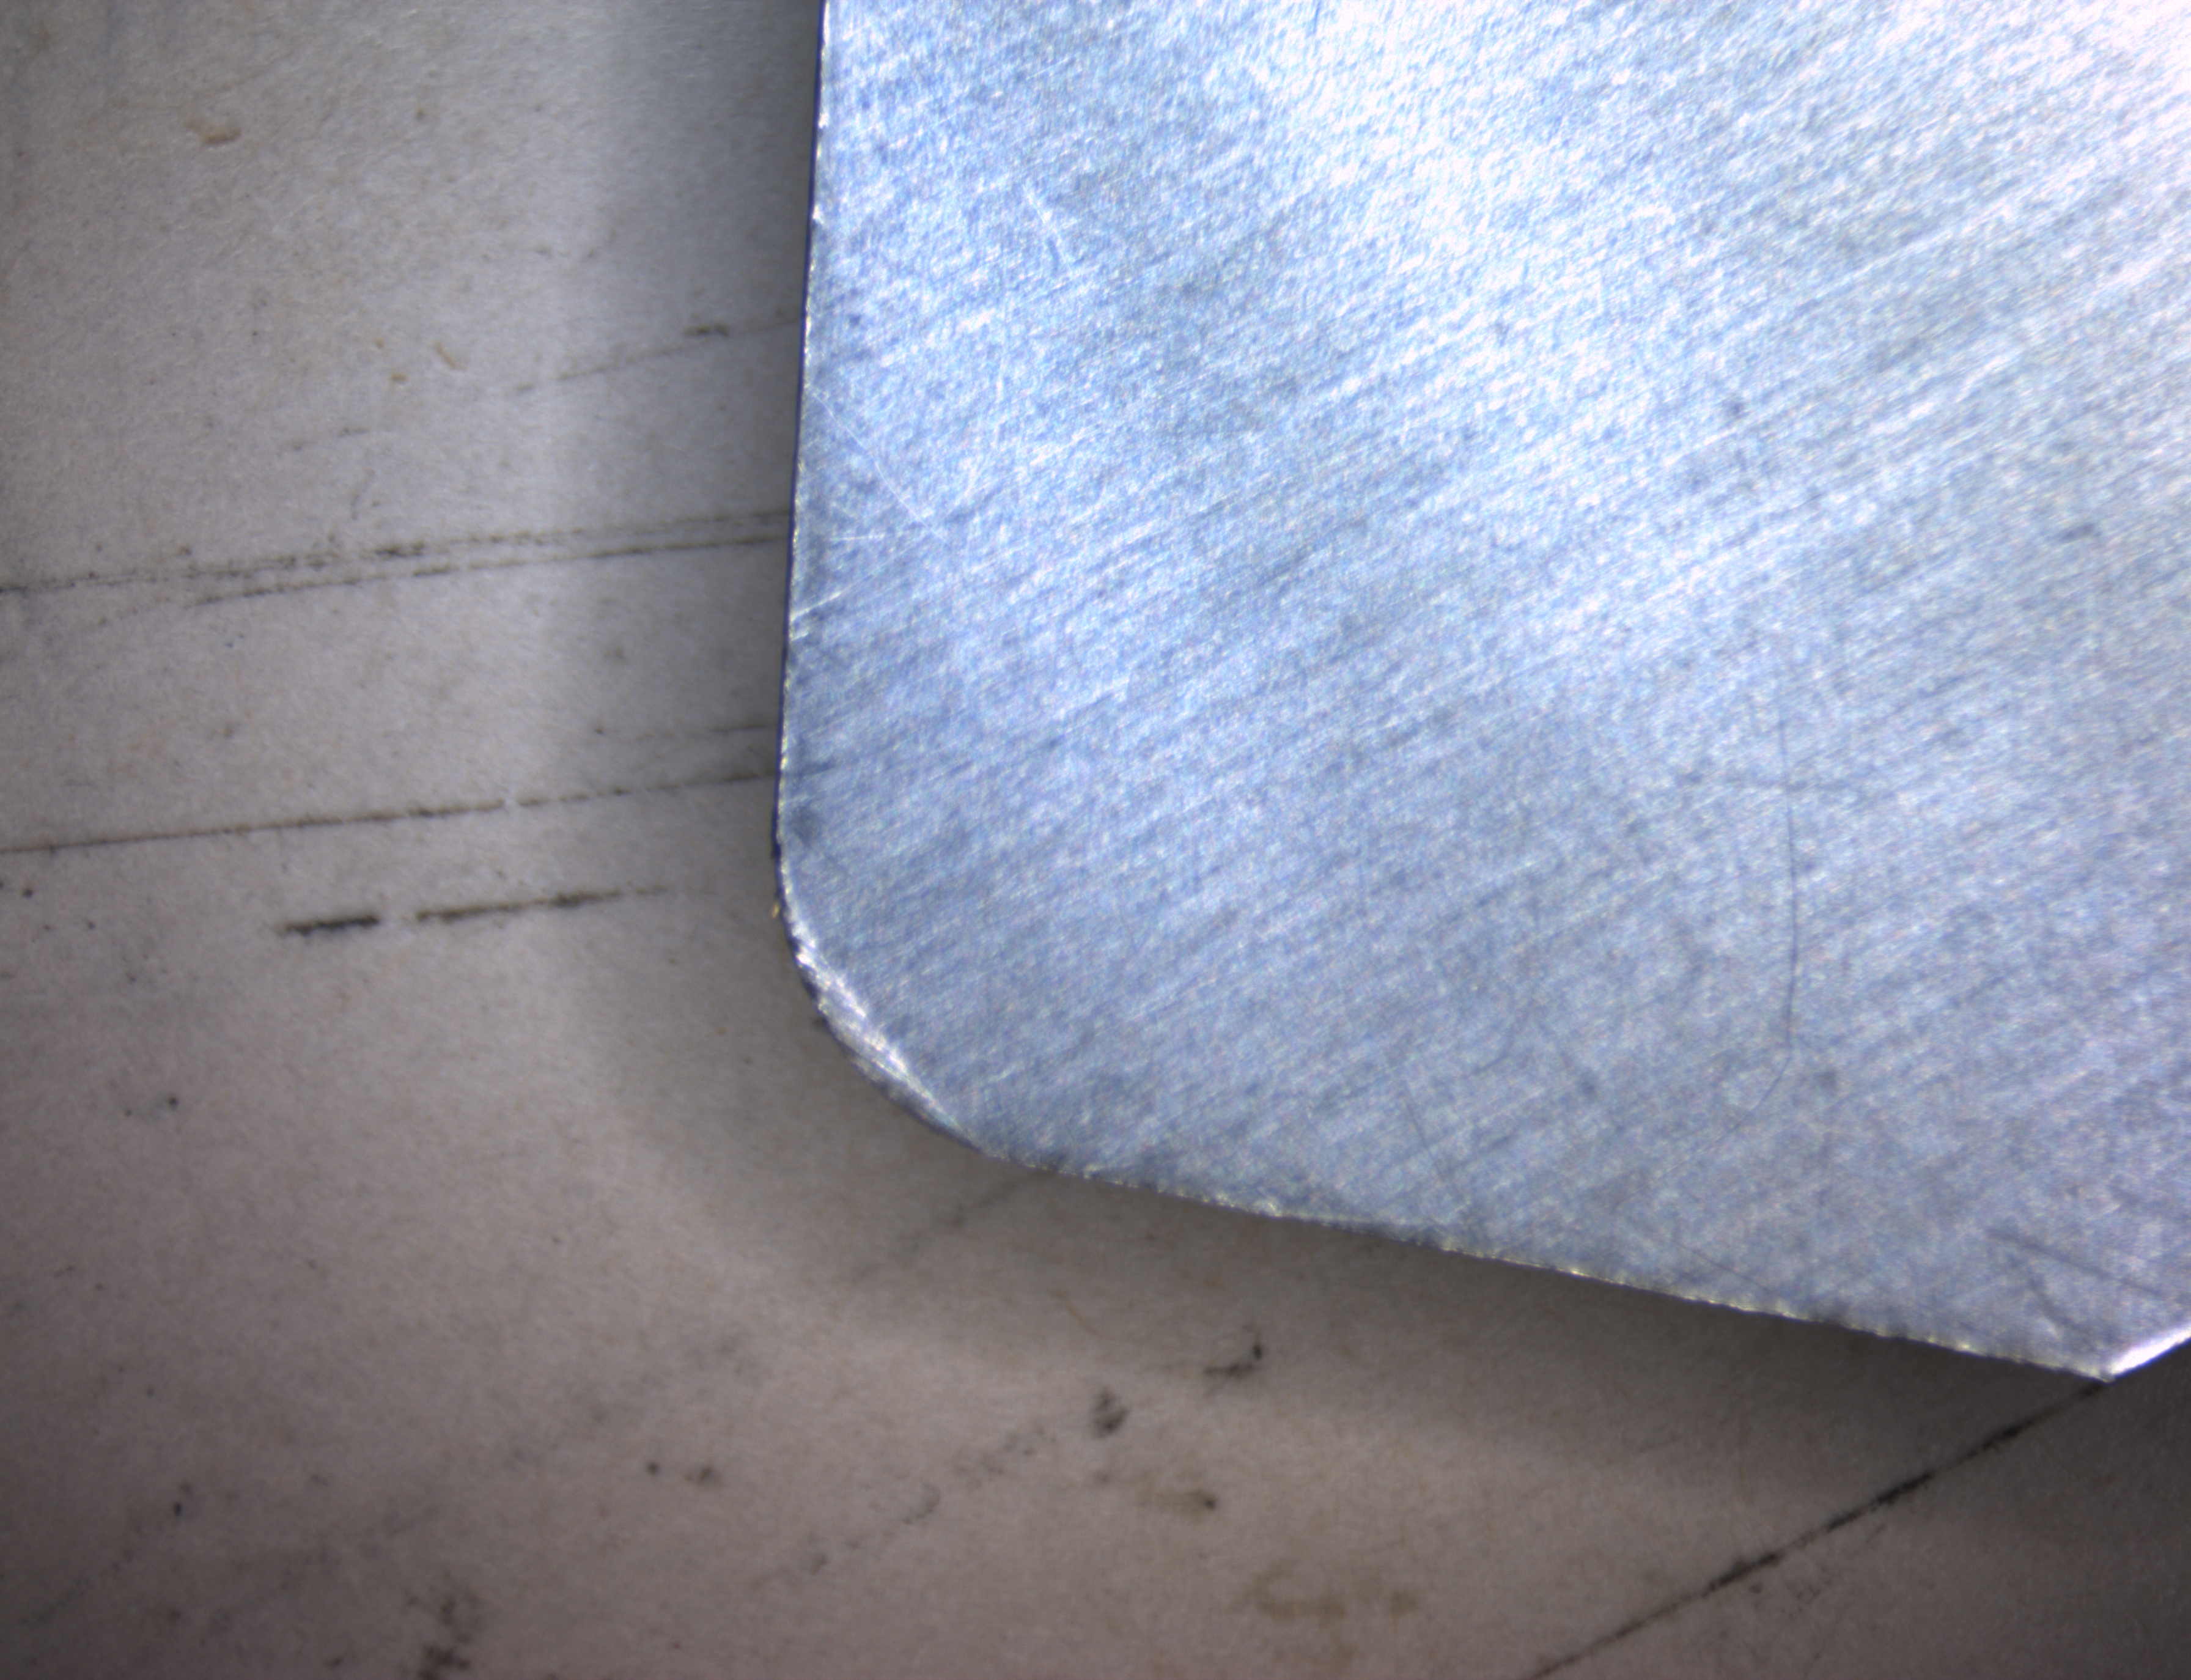
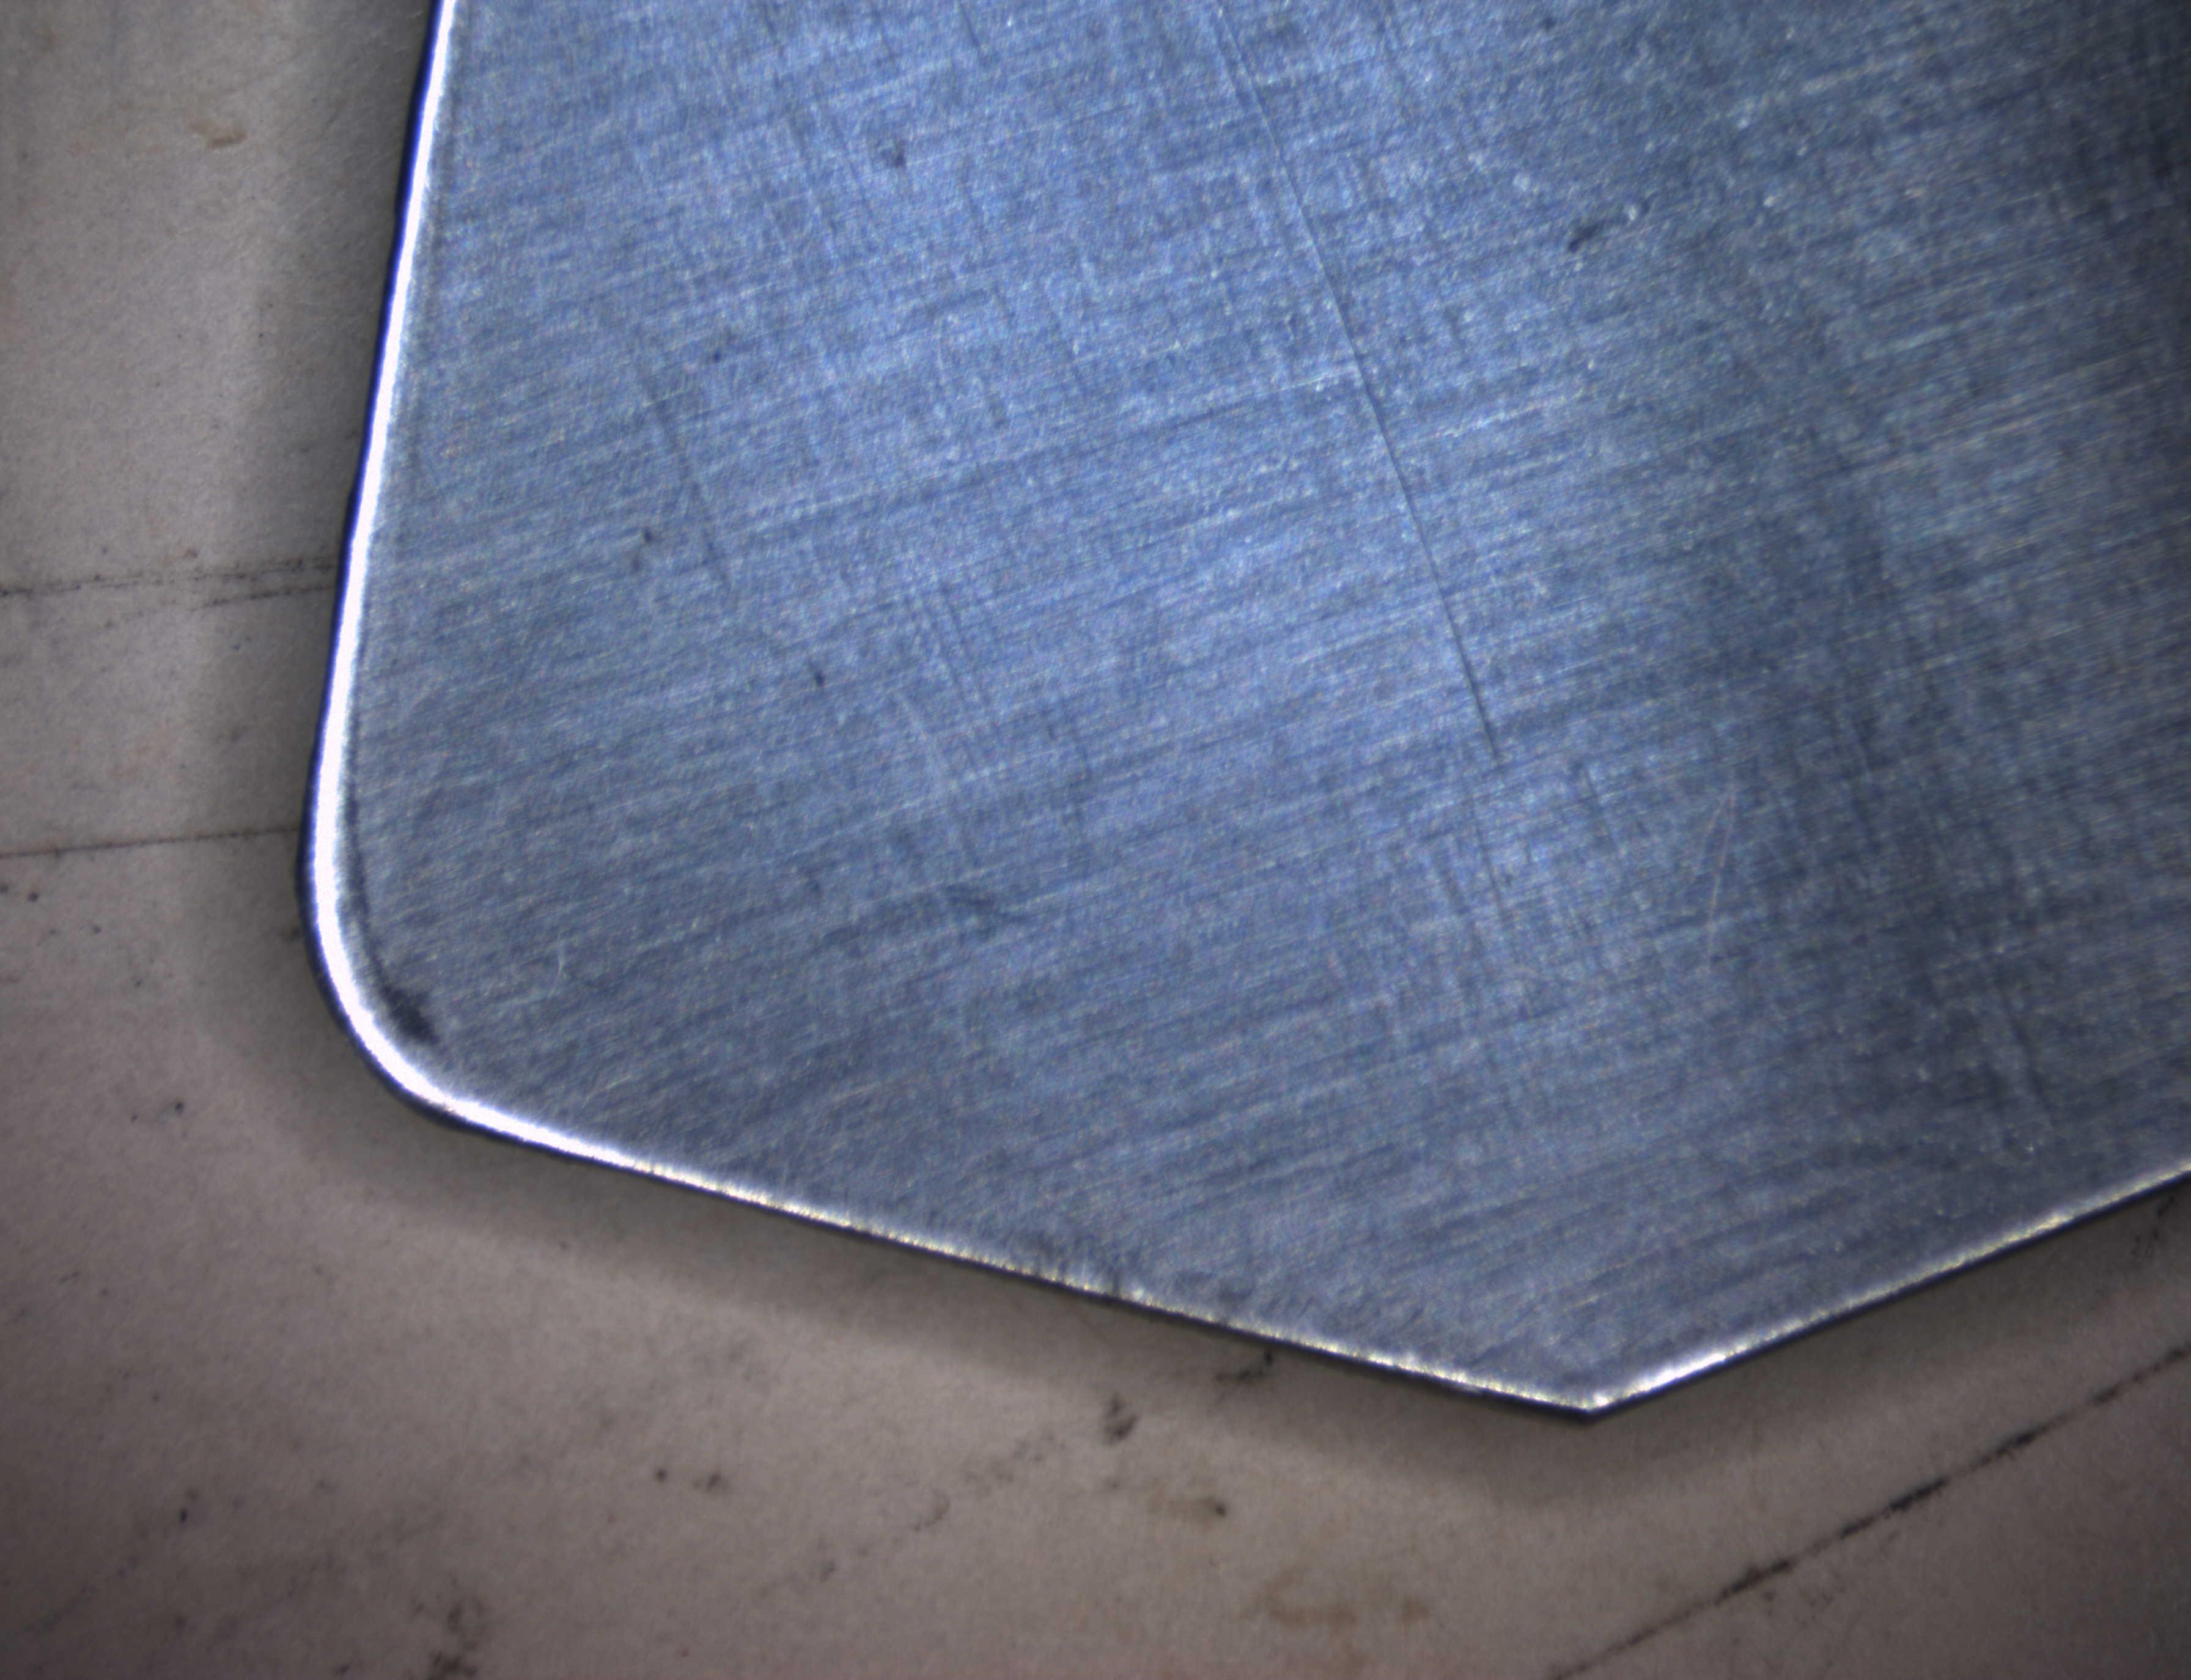
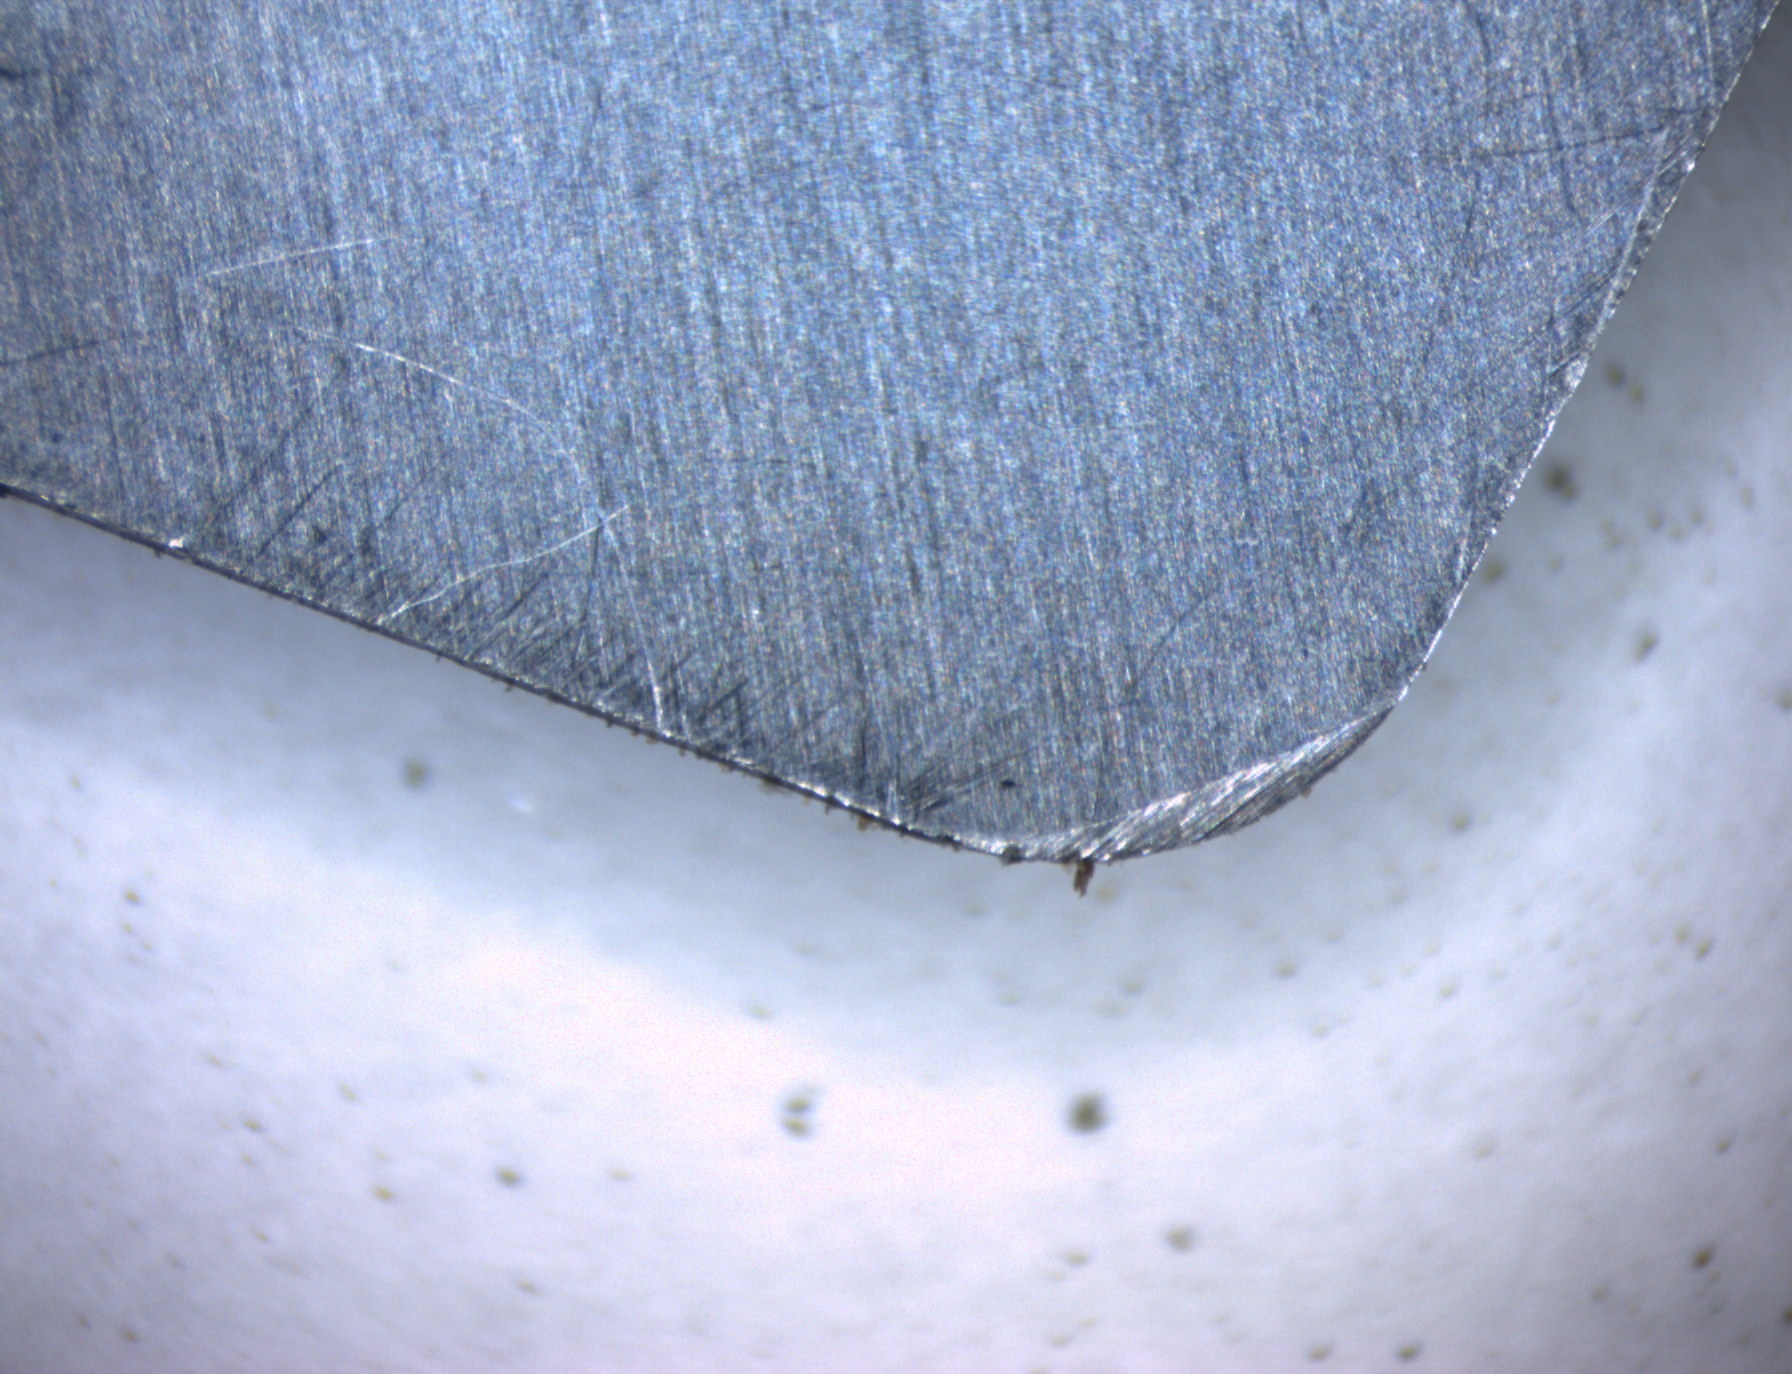
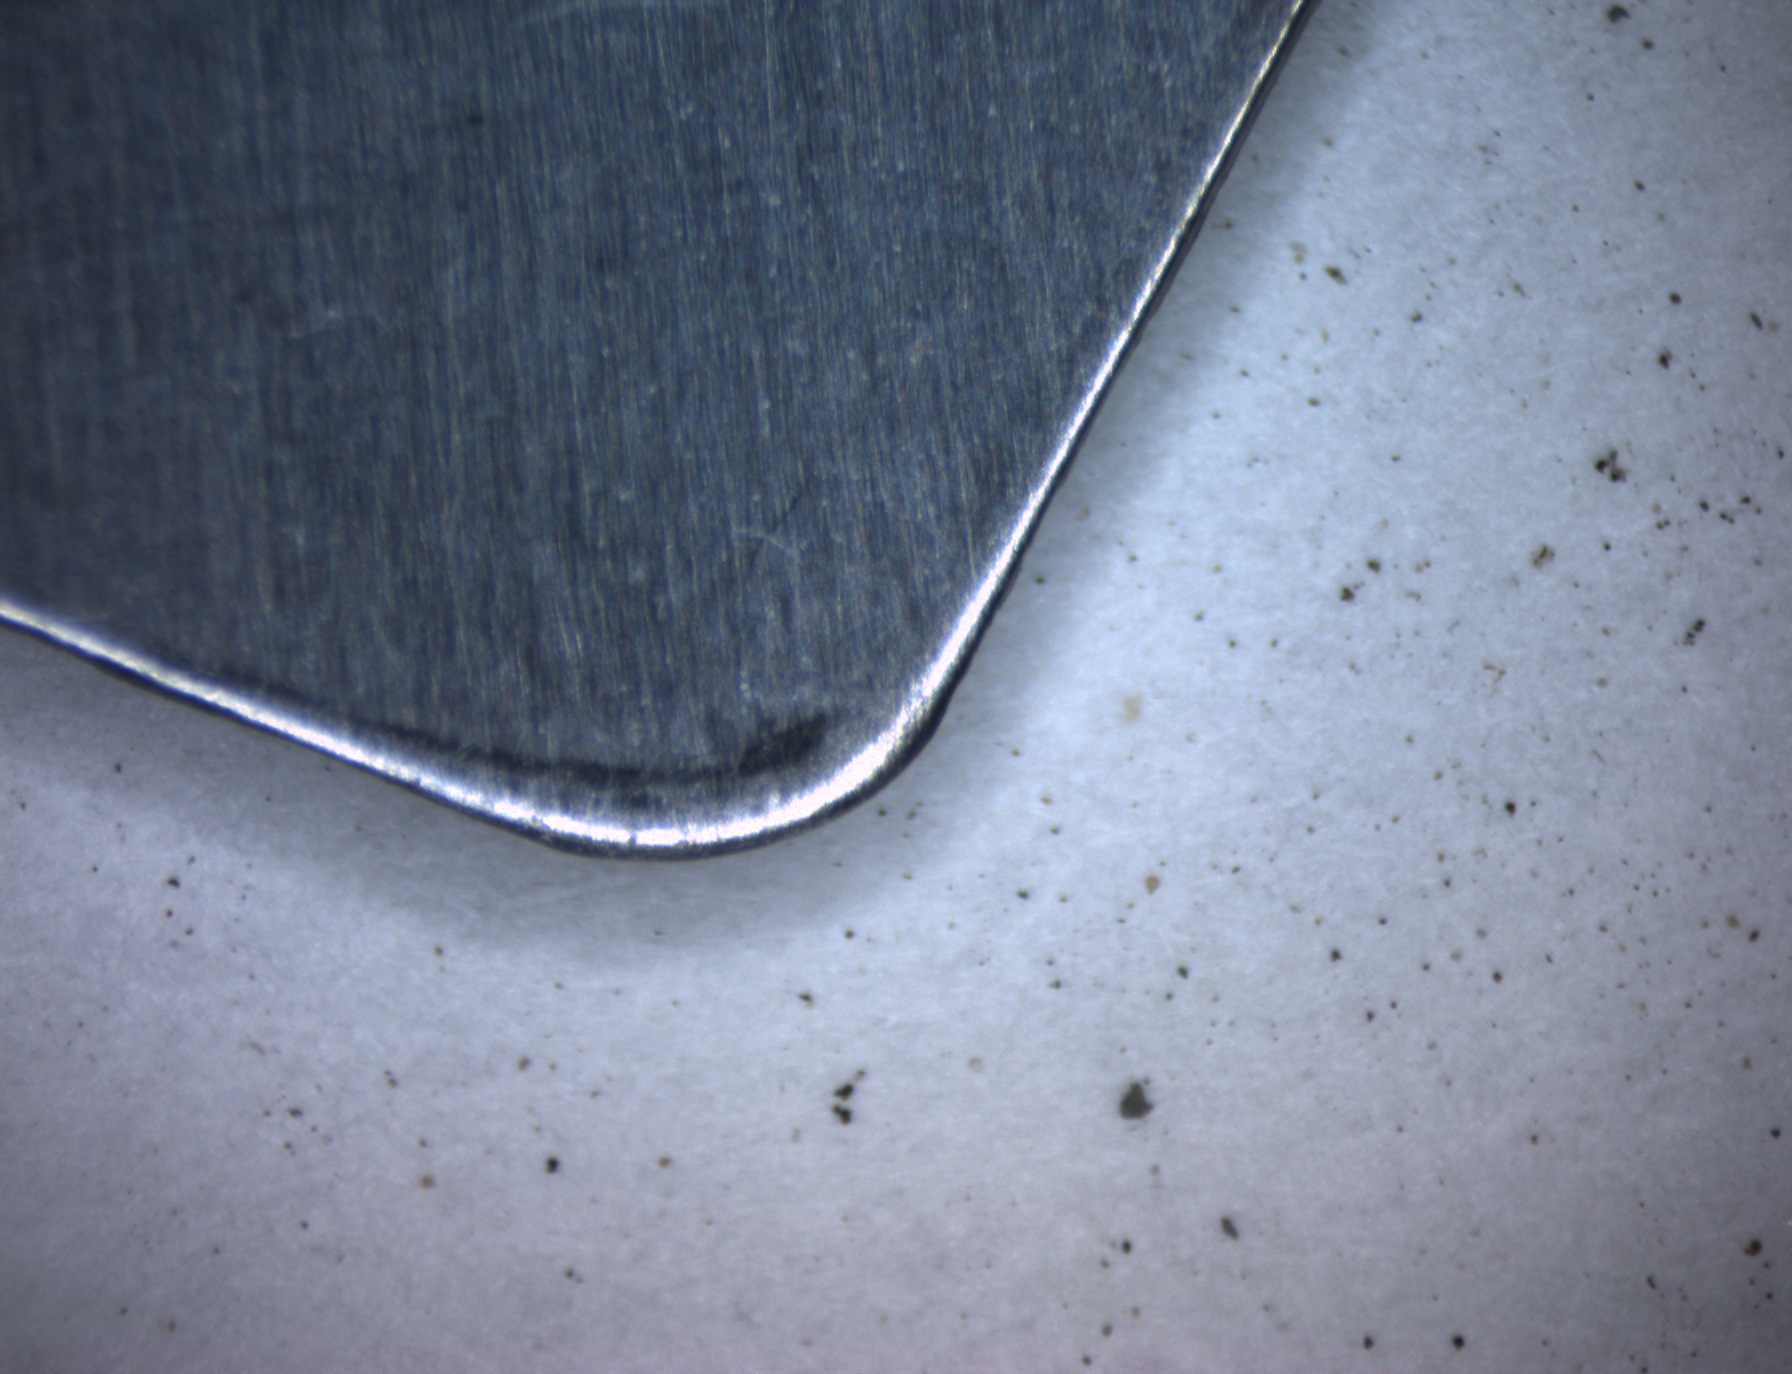
My current struggle started with a Sketchup Pro model done by someone else, modeling a complicated aluminum extrusion. I made a mating part to plug into the end of the extrusion, and printed that, only to discover that the real extrusion is slightly different from the drawing.

I couldn’t make Sketchup do the needed reshapes without it screwing up (I know there must be a way, and now I know that Layers mean something totally un-layer-like in Sketchup, and you are supposed to use nested Groups to get layer-like effects.)

Somehow in the process, Sketchup stopped thinking I had a legitimate solid, so I exported it to STL and used NetFabb’s repair tools on it, which wrap the object nicely (I thought). I eventually got an object that prints and fits properly in the real extrusion, but now I need to add a rounded bulge to it–the project is to make safety bumpers for the extremely sharp extrusions, to save my clothing and my skin. The extrusions are EurekaZone track-saw related products, and I’m always running into them as I walk around my work table or duck under to get tools off the shelves below.

Anyway, I can’t get the Sketchup part that prints and fits to be considered by Sketchup as a valid solid (indicated by Sketchup displaying a volume measurement for it), and until that happens I can’t further modify it in Sketchup.

There are plugins one can add to Sketchup (Solid Inspector, Solid Solver, etc) that analyze a mesh looking for problems and helping you fix them, but I can make them happy (with a lot of effort) and yet Sketchup itself won’t accept the result.

I’ve used various tools to examine the form, and by removing a skin I can look inside, and see little starbursts of spurious vertices that have somehow been created in the process of manipulating the STL mesh. The triangle count went from around 10000 to 1500000, so it’s not easy to fix manually, though I’ve tried. They are often connected to external faces, so if I select a cluster of vertices and delete them, some of the external faces also disappear. Of course, I can replace those manually too.

One approach that appeals would be to delete all but the external surface vertices, and then manually add the real edges and faces back, but I don’t yet know how to do that. I no longer know the true dimensions of all the features, because they were developed in a process of repeated reshapings, but some tools are able to show vertex coordinates, so I should be able to find them (but it’s very tedious–I likely need a few hundred, a lot to write down if it comes to that).

MeshLab looks capable, but you need to know the Mesh business in order to know what to tell it to do. There must be suitable books somewhere, but so far I haven’t found an easy entree that makes MeshLab approachable. I can’t face just trying everything to see what it does.

Blender looks promising, and I started using it, but the interface is difficult. In an experiment, I managed to select two vertices and wanted to put an edge between them, but could not find a tool that makes edges! Obviously there exists such a tool, and I’m sure I saw it once, but now I can’t find it. If your hands brush against the keyboard, every key you touch does something, often apparently irreversable (you can undo the actions but not the mode changes I think), and leaves you in a mode you’ve never seen before. (This must be an exaggeration. Surely.)

I’ve been working my way through a Blender book I bought, but it is aimed at amazing goals like making proper textures, base meshes, etc in preparation for making movies, so it’s going way too deep in directions that I’m not currently interested in, but I need to have some acquaintance with those topics if I’m to recognize some new context I suddenly get switched to so I can figure out how to get back.

Of course, this is not an important project. I could solve my problem by gluing bits of carpet to the part I can print now. But I want to know how to do such things, and it surely must be possible! Somehow the current software seems simultaneously extremely sophisticated and extremely primitive…

I spent 5 hours yesterday printing my first DualStrusion project, a blue Valentine heart with some white text embedded (but slightly raised). The print finished when the heart surface was reached, leaving the white text (mostly hollow) without its top layer. Sheesh. Not my fault…
I’m tempted to get into the GCode level, which I do regularly with laser cutters and milling machines. Then it really will be my fault…

My most satisfying way of doing CAD in 2-2.5D for laser cutters is writing PostScript code, which allows me to parameterize everything in a sensible way. PostScript becomes PDF, which has a laser cutter driver. Presto.

Perhaps the way to get that kind of control for 3D printing is to drive FreeCAD from Python, or SketchUp from Ruby.

I rather like OpenSCAD, but it is very limiting. I recently wanted to print standard pipe threads, and there’s no helical extrude in OpenSCAD that can do it, so I spent a couple days generating thousands of thin triangular solids in the appropriate locations, hulled them together in pairs, unioned those, then subtracted them from a solid. Doing it in Python would be a lot easier. Furthermore, OpenSCAD takes over an hour on a fast Mac Pro to render the result so you can export to STL for printing! I published my solution on ThingiVerse.

If I ever figure out how to do these simple things simply, I should write a book. Sorry about this rant…

Update 24 February 2015:

AutoDesk Fusion360 Ultimate, currently available at no charge, looks very promising. It’s a rewrite from scratch that combines features of Inventor Pro and some of their other software. It’s a hybrid of a direct editor and a history tree-based editor. It still has some gaps, but works at a very useful level. And, it directly supports generating tool paths for milling machines or routers!

Online University Classes

May 27th, 2013

I’ve now taken several online classes, with mostly positive experiences.

On Coursera, I took very useful classes in control of multiple robots and in image processing. I started a course in mathematical thinking, but found the prof quite annoying and dropped it (I had already studied this material, but took it because the prof is famous, to see what it would be like).

I’ve used Khan Academy several times, for freshening up some subjects I needed. In particular, the Linear Algebra I took in 1960 has changed a bit of its terminology and emphasis, and I needed updating for the robot control class.

There is one big practical difference between Coursera and Khan Academy. Coursera tries to force classes to be held on a particular schedule, while Khan Academy lets one work on any topic at any time, whenever you need it.

There are advantages to keeping the classes together–all the students are working on the same concepts and problems at the same time, so the Forum discussions when sorted by time also tend to be sorted by relevant topic. That means it’s easy to ask a question and find others who have just figured out the problem, who can help you understand where you’re going wrong.

But for people who can use Search to find what they need in the historical discussion archives, this synchronization isn’t that important.

Synchronization also helps with keeping exams and homework fresh, so that you work on them without knowing the answers until they are suddenly revealed and graded.

But when you just want to learn stuff, when you happen to need it, the Khan Academy approach is much more useful. If I had had to wait for the next class on Linear Algebra to start, I could not have gotten the info I needed in time to be useful for my robotics class.

Another great resource is WikiPedia, which amazes me how often it has an article that explains exactly what I need to know. What a gigantic, enormous, immense improvement this is over the printed encyclopedias of yesteryear!

Attitudes toward teaching vary

Some (few) people teach with the idea of making the subject as easy as possible to understand. This is very difficult, as it requires great effort to eliminate ambiguities and errors from the course text and problem sets. Such things seem  trivial to the teacher or to anyone who already knows the material, but present enormous barriers to the student, who has to go to great effort to finally discover just what was in error. Humans normally work in environments with very high error rates (for example, people very often say literally the opposite of what they mean), and it works only because of the large shared understanding that forms the background against which everything is evaluated. Much of that background does not yet exist for the student.

Most teachers take only normal efforts to remove errors and ambiguities, and when such an error is pointed out their reaction is often to point out that the student has thus been forced to learn much more. The real world is full of errors and ambiguities, so the student has to learn to deal with them. An important goal for some teachers is to sort out the students, so that only the best go on to the best schools or the best advanced classes.

I think it’s true that a student who successfully understands material that is laced with errors does indeed have a deeper understanding at the end of the process. However, it is an enormous amount of work, and takes an enormous amount of time. The result is that many who would have been capable of learning the material simply can’t complete the job. They may finish the course, and even with a decent grade perhaps, but they haven’t had time to get everything sorted out, so they progress to the next class with a shaky foundation.

Here’s where I think the Khan Academy really has it right. Their passing grade is 100%. You don’t move on until you really understand what you’re currently learning. That greatly speeds progress over the long haul, because you have a reliable foundation on which to build.

What soured me on the mathematical thinking class was the prof’s tolerance of ambiguity. When ambiguities were pointed out, he had no interest in fixing them but blamed the students who chose the wrong interpretation. Seems a bizarre attitude for a mathematician!

Anyway, I’ve only had a few experiences with courses where the prof really tried hard enough to eliminate mistakes and confusions, and I found these courses far more satisfying and stimulating than the usual ones. There’s far more total learning, in my opinion, and far more students get equipped to go on to more advanced topics. I think it’s win-win. But it’s really, really hard work for the prof. Most egos won’t admit to enough possibility of errors to make this approach possible for them.

Khan tells of a class where one student stalled on a basic concept for a week or so. In a normal class, she would have been moved to a slower track, for less capable students, which would have lowered her whole future achievement level. But suddenly she got it, and then zoomed ahead, eventually finishing second in the class! It’s quite unlikely for good things like this to happen in traditional classes, where the most significant thing she would have learned is that she’s not good at the subject, something that isn’t even true.

How to move things when there’s not room for jacks

March 8th, 2013

I have had to move some heavy things that were in an awkward place. I had built some big shelf units to hold 36 banker’s boxes of paper each, to store 72 boxes in an outbuilding. Each weighed well over 1000 pounds. I put 2-inch (50mm)-wide aluminum extrusions on the floor to make smooth tracks, and teflon pads on the bottom of the shelves, thinking I’d be able to move them out of the way so I could get to other things in the building. But the scheme didn’t work. The floor didn’t stay quite flat, and after sitting in one place for a long time the pads didn’t slide on the aluminum, so I couldn’t move the shelves.  I tried to lift the shelves to put some rollers under them, but the limited space around them made it very difficult to use levers and wedges, and there was only a quarter inch (6mm) gap under them, at most. I tried clamping a wooden bar to the side of the shelves and lifting that with a hydraulic jack, but the huge weight just caused the clamps to slip and tear into the plywood of the shelf units while I pumped the jack.

So I was stuck for a while. But then I got an idea.

I took a large ziplock plastic baggie, which is thin enough to slip under the shelves into the  gap between the bottom plywood sheet and the floor. I stuck a thin plastic tube into it, by pushing a sharp pointed awl from the inside of the open bag out through one far corner, sticking the plastic tube onto the awl, and withdrawing the awl and tube so that the tube ended up entering the baggie through a tight stretched inverted hole in the corner. I added some ordinary tape to hold the tube in place, and zipped the baggie shut. I slid the baggie completely under the shelf unit, inside the small gap, and inflated it with compressed air. Because of the large area of the bag, it does not take much pressure to generate a lot of force, and the shelf unit lifted easily. I had to experiment with how high to go, because the bag will come unzipped or burst if you go too far, and everything drops suddenly. But it was easy to slip wedges and blocks under the shelf, carefully keeping fingers away from the danger area, and lift the shelves bit by bit, inserting spacers like magazines to keep the baggie thin as needed.

There are enormous baggies available, intended for storing blankets etc.

Once I had a little working space, like 10 or 20mm, I tried another scheme, using beach balls. I connected four beach balls to thin tubes using ball inflator tips, and put little valves on the tubes so I could control them separately. With one ball underneath near each corner, it was easy to raise the shelf unit far enough to get big blocks underneath in one step, but there is a new problem–the shelf unit is free to move from side to side when on the balls, so everything is unstable. It works better to just lift one side at a time, blocking up the sides alternately, so the heavy shelf can’t roll around.

It’s tempting to use the beachballs instead of rollers for the normal moving of the shelves, but I’d need some good way to control the motion. Also, the tubes get in the way–if a ball rolls over the inflation needle and tube, something is likely to break.

Another time, I needed to bend a heavy board away from the wall (in a corner of a room) briefly while I passed a Cat-5 network wire through the gap, and I used the baggie-with-air trick again.

Why are so many people from Poland registering?

March 8th, 2013

I’ve noticed that there are a lot of users registering with .pl email addresses.

I don’t know of any reason to register unless you want to leave a comment, or perhaps to be notified of new posts.

These new users aren’t posting comments.

So, I’m puzzled! Why are you registering? I’m curious… 90% of my users are from Poland!

eBay Buyer Protection no help with foreign purchases

November 28th, 2012

I bought a battery charger/exerciser from a Chinese seller on eBay, and it arrived non-functional. I.e., it lit up but it wouldn’t charge anything, it merely complained about the battery connection (which worked fine on other chargers, my older one and the one I later bought from an American vendor to replace this dead one). So, it was DOA even though it didn’t look like it at first glance. It probably passed a superficial test at the factory, which wouldn’t have taken time to actually try charging something.

I tried for a long time to negotiate with the seller, and she went as far as offering me another one for half price. Finally, when I repeated that I felt since I’d bought and paid for a working one, that’s what I should receive–I shouldn’t have to buy it again, even with a discount, she said OK 😉

But nothing ever arrived, and she never responded again to my emails. Her listings still appear on non-US eBay sites, though she seems to have withdrawn from the US sales for the time being.

So, it seemed clearly like a case where I should invoke the Buyer Protection Plan. (Product does not match description (it doesn’t work, but description implies it does)).

All seemed fine until the end, where eBay gave me 3 days notice (while I was away on a trip) to prove that I had returned the product, using a traceable shipping method. Miss the sudden deadline, and the complaint is void!

Even though the product had been mailed to me from China for less than $20, the shipper had a special deal. The price for me to ship it back traceably using UPS was more than the initial price of the product!

So, the Buyer Protection plan was actually worse for me than doing nothing and just eating my loss, which of course I did. As far as I can tell, eBay does not provide any way to tell them this–every complaint pathway is fully automated so that there is no way to tell the story to a human, and the system does not want to discuss my type of complaint.

So, people need to realize: buying from eBay may not be safe, despite their claims of Buyer Protection. You will be out the return-shipping costs, even if the product is dead on arrival, and those costs can easily exceed the price of the merchandise, especially when you’re buying from a remote seller, like Hong Kong or China.

Of course, some sellers care about their reputation and will do the right thing, but buying through eBay is at your own risk in some cases, and partially so in other situations.

Sears Craftsman C3 tools work well (only) with Lithium

November 28th, 2012

I’ve been using many of the Sears Craftsman 19.2V C3 series of battery-powered tools for several years now, and have been quite pleased with their performance.

Unfortunately, they generally come with NiMH battery packs, and those I find less than useless (i.e., more trouble than they are worth). For my kind of intermittent use, those packs are usually flat or nearly so when I go to do something, and they seem to have a very short useful life. Sears ought to discontinue them, in my opinion, because they bring disrepute to the whole tool family.

But the big (now middle-sized) Lithium battery packs are great! They hold their charge for very long times, and hold enough energy to do serious work on each charge. I haven’t tried the small Lithium battery packs that Sears now includes with some of the tools–they don’t seem enough cheaper or lighter to be worth the bother. And I’ve just purchased a couple of the new extra capacity 4AH XCP series, but have no experience with them yet. At present, those are selling for the price they used to charge for the big packs.

Over the years, they have had a number of sales of the big Li packs with fast chargers for $89, so I’ve accumulated a bunch. They really have been the key to making the tools useful. Only one battery has failed, and it was covered by the warranty–I rarely purchase the extended warranty for anything, but in this case it was given me as part of an exchange/replacement. I had to struggle to get the promised actual replacement, though–Sears wanted to give me a credit for the (sale) price I’d originally paid, which was not enough to purchase the promised replacement anymore. But I complained and eventually the manager sold me the replacement for that exact amount, so I was satisfied.

The tiny hand vac, 315.115710, is a bit marginal. I think the airflow is just too limited, but they do work. The sound is awfully shrill, though. But I prefer them to my previous hand vacs just because the battery system is compatible with my C3 tools.

A bit bigger and more friendly and effective is the portable wet/dry “canister” vac in this family, 315.175980. It hasn’t always been available to buy, but I now have two of them. I find these quite useful for vacuuming floor edges and corners, webs from ceilings and skylights, occasional localized messes.

I find the inflator, 315.115860, handy for car and bike tires, even though I have an air compressor.

The radio, 315.101260, was a disappointment. It runs the battery down in less than a day’s work. It looks like it has an incandescent bulb to light the dial, which might explain it. Probably they figured the battery was huge so they didn’t have to care about efficiency, but the result is I use a smaller battery-powered (3 AA) radio, which runs for weeks.

The drills are really strong and rugged. A big surprise for me was the impact driver, which I didn’t buy for a long time, figuring the drills were good enough for driving screws and lag bolts. But a construction guy suggested I try one, and now I use it all the time. It is really a lot better for driving screws (or removing them), using its impacts for the hard going part and turning very fast when the going is easy.

I wish they’d add an oscillating tool (like the famous Fein Multimaster) to the family. They have one in the 12v NexTec line, which is very useful, but not as rugged as I’d like. I’ve had trouble with the battery-retaining system, perhaps wearing due to the extended vibration or perhaps softening due to heat, but some battery packs don’t want to stay in by themselves now. The NexTec series are quite usable, but you really have to have extra batteries ready for swapping if you’re going to do serious work with them. I wish the NexTec and Dremel Li batteries were interchangeable. Both are good, and very similar, but it’s not efficient to have separate spares and chargers for both systems.

I’ve also found the NexTec electric hammer useful for odd situations, cramped working areas, etc. It’s awfully noisy, but effective.

Nice refrigerator

November 5th, 2012

A couple years ago my wife and I got tired of our Side-by-Side fridge, because the small shelves resulted in inconvenient access and/or unusable space. We bought a large Kenmore Elite French-Door model from Sears, model 795.71054.010.

We immediately upgraded one of the shelves by buying a split shelf (as an expensive repair part) from the next higher model, a good choice, so we could handle tall items more efficiently.

I was concerned because people had reported problems with the icemaker, but decided to risk it anyway.

The icemaker and water dispenser are in the door of the refrigerator space, not the freezer, so that requires an insulated section in the door and a mechanism to blow freezing air up into that section from the bottom freezer.

That turns out to work well. The one problem that we had was that now and then the ice cubes would stick together and form an arch over the dispenser mechanism, so it couldn’t knock any cubes loose to dispense. The workaround was to open the little door into the ice dispenser section and stir the cubes up with a long spoon or a knife. One clue as to the problem  was that some ice would form on the outer edge of the mechanism (toward the little door), and some water would trickle down and freeze in the little door’s gasket along the bottom.

Eventually the ice maker died, and a new one was sent. The new one is better, in that it never dribbles water where it shouldn’t, and in several months the ice cubes have only arched up and jammed once. I suspect a good practice would be to occasionally use chipped ice, which runs the mechanism in the opposite direction, to help keep the cubes loose.

Installation was a nightmare, but Sears compensated for the trouble by giving us an extended warranty (nice when the ice maker failed). The installers measured our doorways and said the refrigerator was too large, that the wood trim on the doorway would have to be removed. I agreed to do that, and told them to bring the fridge in through the other door (through two rooms). They did that, and by the time they arrived at the kitchen door I had the trim removed. But they said they’d used all the time allotted, and I’d have to get another appointment to finish the installation, and they left. Sears said it would be a week for the new appointment, minimum, which was a big problem, needless to say. We had our food in ice chests for the transition, but not good enough for a week or more!

So I installed it myself. It was awkward for one person, because it had to be lifted 9″ from the family room floor level to the kitchen floor level, and concurrently rotated through the doorway. I maneuvered it onto a strong 3/4″ plywood piece about 4’x5′, and raised that with levers and blocks of wood until it was level and even with the kitchen floor, which made moving the fridge fairly simple since no further lifting was required. Just had to be careful crossing the threshhold and making the turn. So by the end of the evening we had refrigeration again. But the next day I contacted Sears and complained a lot. (The installers had also broken a piece from the door latch–found bits of it where their truck had been parked. So I requested replacement of that as well.) Sears responded by replacing the broken piece, removing the installation charges, and giving us a free extended warranty. Seemed fair enough, though of course I’d have much preferred to just have had the installation done properly.

Anyway, net-net, the fridge has been a significant improvement over our previous side-by-side, and it has mostly worked well, so we’re pleased with it.

It has a new kind of mechanism inside–not a normal rotary compressor. It sounds a little different, but cools well. I suspect the compressor is some kind of acoustic device.

Sprinkler Controller

November 3rd, 2012

I’m really pleased with a new open-source sprinkler controller I bought. It’s a project of Chris Anderson (who just resigned as editor in chief of Wired magazine) and Ray Wang of Ray’s Hobbies.

It cleanly replaced my old traditional electronic timer controller (12 channels, 24VAC), making it easy to move the wire connections over, and using the existing 24VAC transformer for power. The big virtue of Ray’s controller is that it is network connected, and very versatile. It’s a stand-alone Arduino computer with a small LCD display and a few buttons, with an Ethernet connector that can either connect to your computer system via wire (which I’ve done) or via WiFi (by buying a WiFi access point from whomever).

Now I can see the programs on screen, much easier to check and edit than the old timer system. It’s expandable to 32 channels with little effort, just plug in the expander boxes for groups of 8 channels. In principle it can go even larger, and can be customized in a variety of ways if you like to hack.

Its web interface lets me manually control the sprinklers from my iPhone as I walk around the yard, and I can check on things or change programs from anywhere in the world (I did set up Port Forwarding on my home router, and use a dynamic IP address manager, Dyn.com, to make this happen, but I’d already done that for other purposes so it was little trouble.)

It’s called OpenSprinker, at http://rayshobby.net
For hackers, all the software is available online so you can reprogram it any way you like.

In fact, I expected to do just that. One of the features the system lacked, which I really really wanted, was a log of what watering was actually done over the last week.

But it turned out that Ray designed the system so flexibly that I was able to do everything I wanted just by writing my own web page that kept a log and then formatted it and displayed it the way I liked. I just used PHP and adapted some of Ray’s public JavaScript, and presto–no reprogramming of the Arduino was needed. Nice!

I’ve been very impressed by the quality of Ray’s software and the care he’s put into his hardware design. It’s really great that he’s made these things open source. However, I bought the assembled and tested version, to save time. (I bought the main controller plus one 8-channel expander box, for 16 total.) But it was the open source nature of the system that made me decide to buy it, because that way I know I’m not trapped if I want to make basic changes. It’s so much nicer (and less buggy) than normal commercial products.

Of course, I’ve made my software available too, via Ray’s site.

Someone in Australia already contacted me who has adapted it to his commercial nursery setup!

Update: I had a problem! My wife said the system wasn’t watering part of the garden, and I looked at the logs and said that it was! Eventually I went out to the garden and used my iPhone to turn on the corresponding circuit, and sure enough–no water. So I investigated, and the problem turned out to be that the cable connecting all the sprinkler wiring to the controller had gotten pulled, and about half the circuits were no longer making contact! So, the controller was indeed telling the system to turn on the water, but the wires didn’t carry that info to the valve, so no water arrived.

I fixed the problem by making some little clips that hold the connector onto the controller securely. The better solution for the long run would be to use connectors that have a latching feature.

Of course, this has started a long-term project to measure the moisture in the soil, which could not only detect such failures but could also be useful in figuring out how long one needs to water, which is purely a guess now.